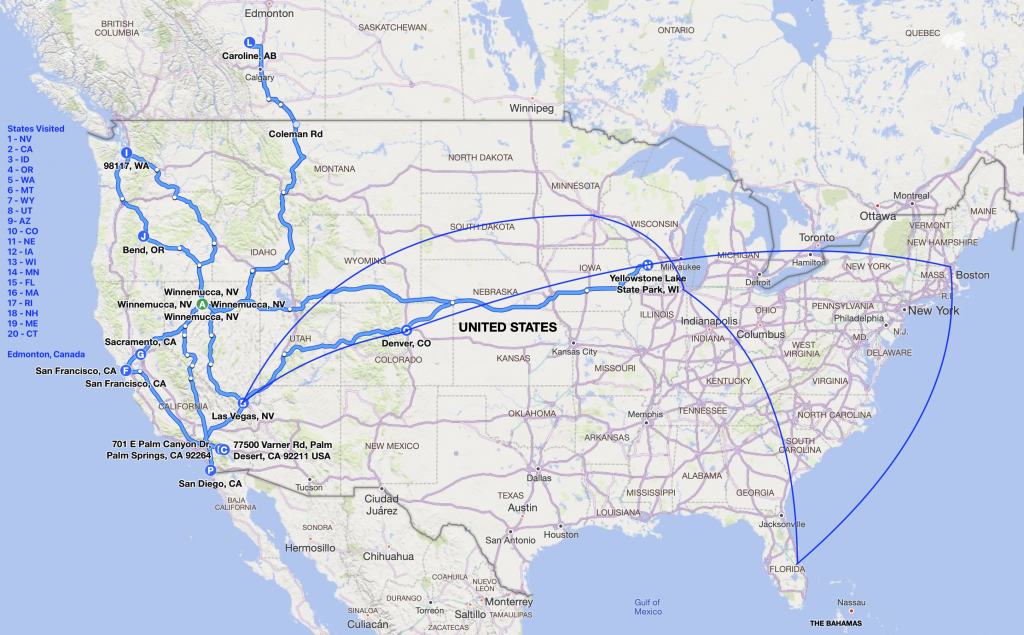
It’s been a busy year of travel for us. By the time the year is over we’ll have visited twenty of the United States and one Canadian Provence.
Unlike the last two years this year we’ve done some travel by airplane!
Our big trips this year included a visit to Palm Springs where we drank too much, made new friends, and had a good time. Second big trip was to Seattle where we saw friends, ate good food, and bought a new truck in Bend, OR on our drive home. Then it was off to points California for work and play before heading to Canada for two weeks of camping in the woods. Our last big Airstream trip was to Wisconsin to visit friends and camp for another two weeks.
Up next is a multi-state flight affair from Vegas to Chicago to Orlando to Boston and back…
We’ve been very busy building out our homestead in northern Nevada between traveling cross the country. Sadly, this means that I’ve not had as much time to update our website. That changes today. Over the coming weeks I’ll add posts about our land progress, travel in 2022, and future plans.
Hanukkah is also known as The Festival of Lights and **The Festival of Rededication. Hanukkah is the eight-day celebration that starts on the 25th day of Kislev; which may be in December, late November, or early January (as was the case last season). The festival is observed by the kindling of lights on each of the eight nights of Hanukkah; one on the first night, two on the second, three on the third, four on the fourth, five on the fifth, six on the sixth, seven on the seventh, and finally all eight on the final evening of the holiday.
There are several historical accounts of the birth of Hanukkah. Wikipedia has a nice write up – http://en.wikipedia.org/wiki/Hanukkah
** The holiday was called Hanukkah meaning “dedication” because it marks the re-dedication of the Temple after its desecration under Antiochus IV. Spiritually, Hanukkah commemorates the Miracle of the Oil. According to the Talmud, at the re-dedication of the Temple in Jerusalem following the victory of the Maccabees over the Seleucid Empire, there was only enough consecrated olive oil to fuel the eternal flame in the Temple for one day. Miraculously, the oil burned for eight days – which was the length of time it took to press, prepare and consecrate new oil.
However, non-Talmudic sources include no reference to the eight days of oil that has come to be a popular understanding and modern practice of Hanukkah. The Hebrew deuterocanonical books of 1 Maccabees and 2 Maccabees record different reasons as the origin of the eight days of Hanukkah. 1 Maccabees reads that, “For eight days they celebrated the rededication of the altar. Then Judas and his brothers and the entire congregation of Israel decreed that the days of the rededication…should be observed…every year…for eight days. (1 Mac.4:56-59)”
2 Maccabees says, “The Jews celebrated joyfully for eight days as on the feast of Booths.”
Another interpretation for the 8 day ceremony is that it commemorates the story of Hannah and her 7 sons. The story depicted in the Talmud and in the Book of Maccabees accounts how Hannah’s 7 sons were tortured and executed according to Antiochus’ policy when they refused to bow to a statue and to taste pork. Hannah herself committed suicide after the death of her sons.**
In our last installment we spoke about Apple Picking, Folk Lore, and The Do’s and Don’ts of Leaf Peeping. This time we shall explore my favorite recipes of the season starting with something to drink – Spiced Apple Cider, something to eat – Beef Stew in a Pumpkin and something for dessert Apple Pie.
Hot Spiced Apple Cider:
Ingredients:
6 cups fresh apple cider
1/4 cup pure maple syrup (more or less, to taste)
2 cinnamon sticks
6 whole cloves
6 whole allspice berries
6 strips orange peel
6 strips lemon peel
Procedure:
Pour the apple cider and maple syrup into a large stainless steel saucepan. Place the cinnamon sticks, cloves, allspice berries, orange peel and lemon peel in the center of a washed square of cheesecloth; fold up the sides of the cheesecloth to enclose the bundle, then tie it up with a length of kitchen string. Drop the spice bundle into the cider mixture.
Place the saucepan over moderate heat for 5 to 10 minutes, or until the cider is very hot but not boiling.
Remove the cider from the heat. Discard the spice bundle. Ladle the cider into big cups or mugs, adding a fresh cinnamon stick to each serving, if you like.
Beef Stew in a Pumpkin
Ingredients:
A plump, very fresh, 10 – 12 lb pumpkin with a wide, steady base
4 tablespoons olive oil
2 pounds beef, cut in 1″ cubes
2 tablespoons brandy
1 cup coarsely chopped green onion
1/2 cup chopped green pepper
3 large minced garlic cloves
3 cups beef stock
1 cup madeira or dry sherry
3 medium tomatoes, chopped
1 bay leaf
1 teaspoon salt
1/2 tsp oregano
1/4 tsp pepper
1 1/2 pounds white potatoes, peeled and cut into 1/2″ cubes
1 1/2 pounds sweet potatoes, peeled and cut into 1/2″ cubes
1/2 lb zucchini, slices about 1/4″ thick
1 cup corn
12-14 dried apricots
12-14 pitted prunes
1/2 cup butter
1/2 cup brown sugar
3 tablespoons cinnamon
Pinch ground cloves
Procedure:
Scrub pumpkin well.
Heat 3 tablespoons oil in 5 quart casserole over medium heat. Add beef in batches to brown on all sides. Warm brandy, ignite and pour over beef. Transfer meat to platter and set aside. In same casserole pot, combine oil, onion, green pepper and garlic, cooking over medium heat about 5 minutes, stirring frequently. Add stock and madeira and bring to boil. Scrape sides and return meat and juices to pot.
Stir in tomatoes, salt, oregano, pepper, bay leaf, and cloves. Cover, reduce heat to low and cook 15 minutes. Add potatoes and cook 15 minutes more. Stir in zucchini and cook 10 minutes more. Add corn, apricots and prunes and cook another 5 minutes. Keep stew warm on low heat while preparing pumpkin.
Preheat oven to 375 degrees Fahrenheit. Cut pumpkin about 3 or 4 inches from top to form a lid and do not remove stem! Scrape out seeds and string fibers from lid and base. Brush melted butter inside pumpkin and sprinkle with sugar and cinnamon. Replace lid and bake pumpkin in roasting pan about 40 minutes.
Pour juices from pumpkin into stew and stir well. Place stew into pumpkin and bake about 15 minutes longer.
Apple Pie
Ingredients
For crust
2 cups all purpose flour
1/2 teaspoon sugar
1/2 teaspoon salt
3/4 cup (1 1/2 sticks) chilled unsalted butter, cut into 1/2-inch pieces
2 tablespoons chilled vegetable shortening, cut into 1/2-inch pieces
6 to 7 tablespoons chilled orange juice
For filling
2 generous tablespoons coarsely chopped dried tart cherries
2 1/2 pounds Golden Delicious apples, peeled, cored, thinly sliced
3 1/2 tablespoons all purpose flour
1/2 teaspoon ground cinnamon
1/2 teaspoon ground cardamom
1/4 cup honey
1/4 cup (1/2 stick) unsalted butter, melted
1 tablespoon grated orange peel
Procedure:
Make crust:
Combine flour, sugar and salt in large bowl; add butter. Using fingertips, rub in butter until pieces range in size from rice grains to peas. Add shortening; rub in until pieces are size of small peas. Sprinkle 5 tablespoons juice over, tossing gently with fork to blend. Continue adding enough juice 1 tablespoon at a time, tossing with a fork, to form moist clumps. Gather dough into ball; divide into 2 parts, 1 slightly larger than the other. Flatten dough onto disks. Wrap in plastic; chill 1 1/2 hours or up to 1 day.
Make filling:
Mix cherries, apricots, peaches and orange juice in large bowl. Let stand 30 minutes. Mix in apples, flour, cinnamon and cardamom; then mix in honey, butter and orange peel.
Position rack in bottom third of oven, and preheat to 425°F. Roll out larger dough disk on lightly floured surface to 13-inch round. Transfer dough to 9-inch-diameter glass pie dish. Trim overhand to 1/2 inch. Roll out second dough disk on lightly floured surface to 12-inch round. Using fluted pastry wheel or knife, cut dough into 1/2-inch-wide strips. Spoon filling into bottom crust. {Step Two} Arrange 6 pastry strips evenly atop filling. Arrange 6 more strips at right angles, forming lattice. Fold under ends of strips with overhanging dough. {Step Three} Crimp crust edge decoratively.
Bake pie 10 minutes. Reduce oven temperature to 350°F. Bake until apples are tender and juices bubble thickly around edge, about 1 hour 10 minutes longer. Transfer pie to rack. Cool 1 hour.
Updated annually from a project George started back in 2003.
I share these Fall Fun Facts with you because we are on the cusp of my favorite season. How do I know that fall is right around the corner? For starters the temperature in the Boston area has fallen below sixty-five degrees during the overnight hours – ideal weather for sleeping. I received a message from my grandmother telling me that she has started to can her veggies, meaning that her harvest is done, and I will be making a stop in Tiverton for sauces and marmalades. But the real indication to me that the season is about to change is that the colleges and schools are gearing up for full sessions.
With this in mind I share some Fall Fun Facts as shared with me by my former temporary employee George.
Apple Picking
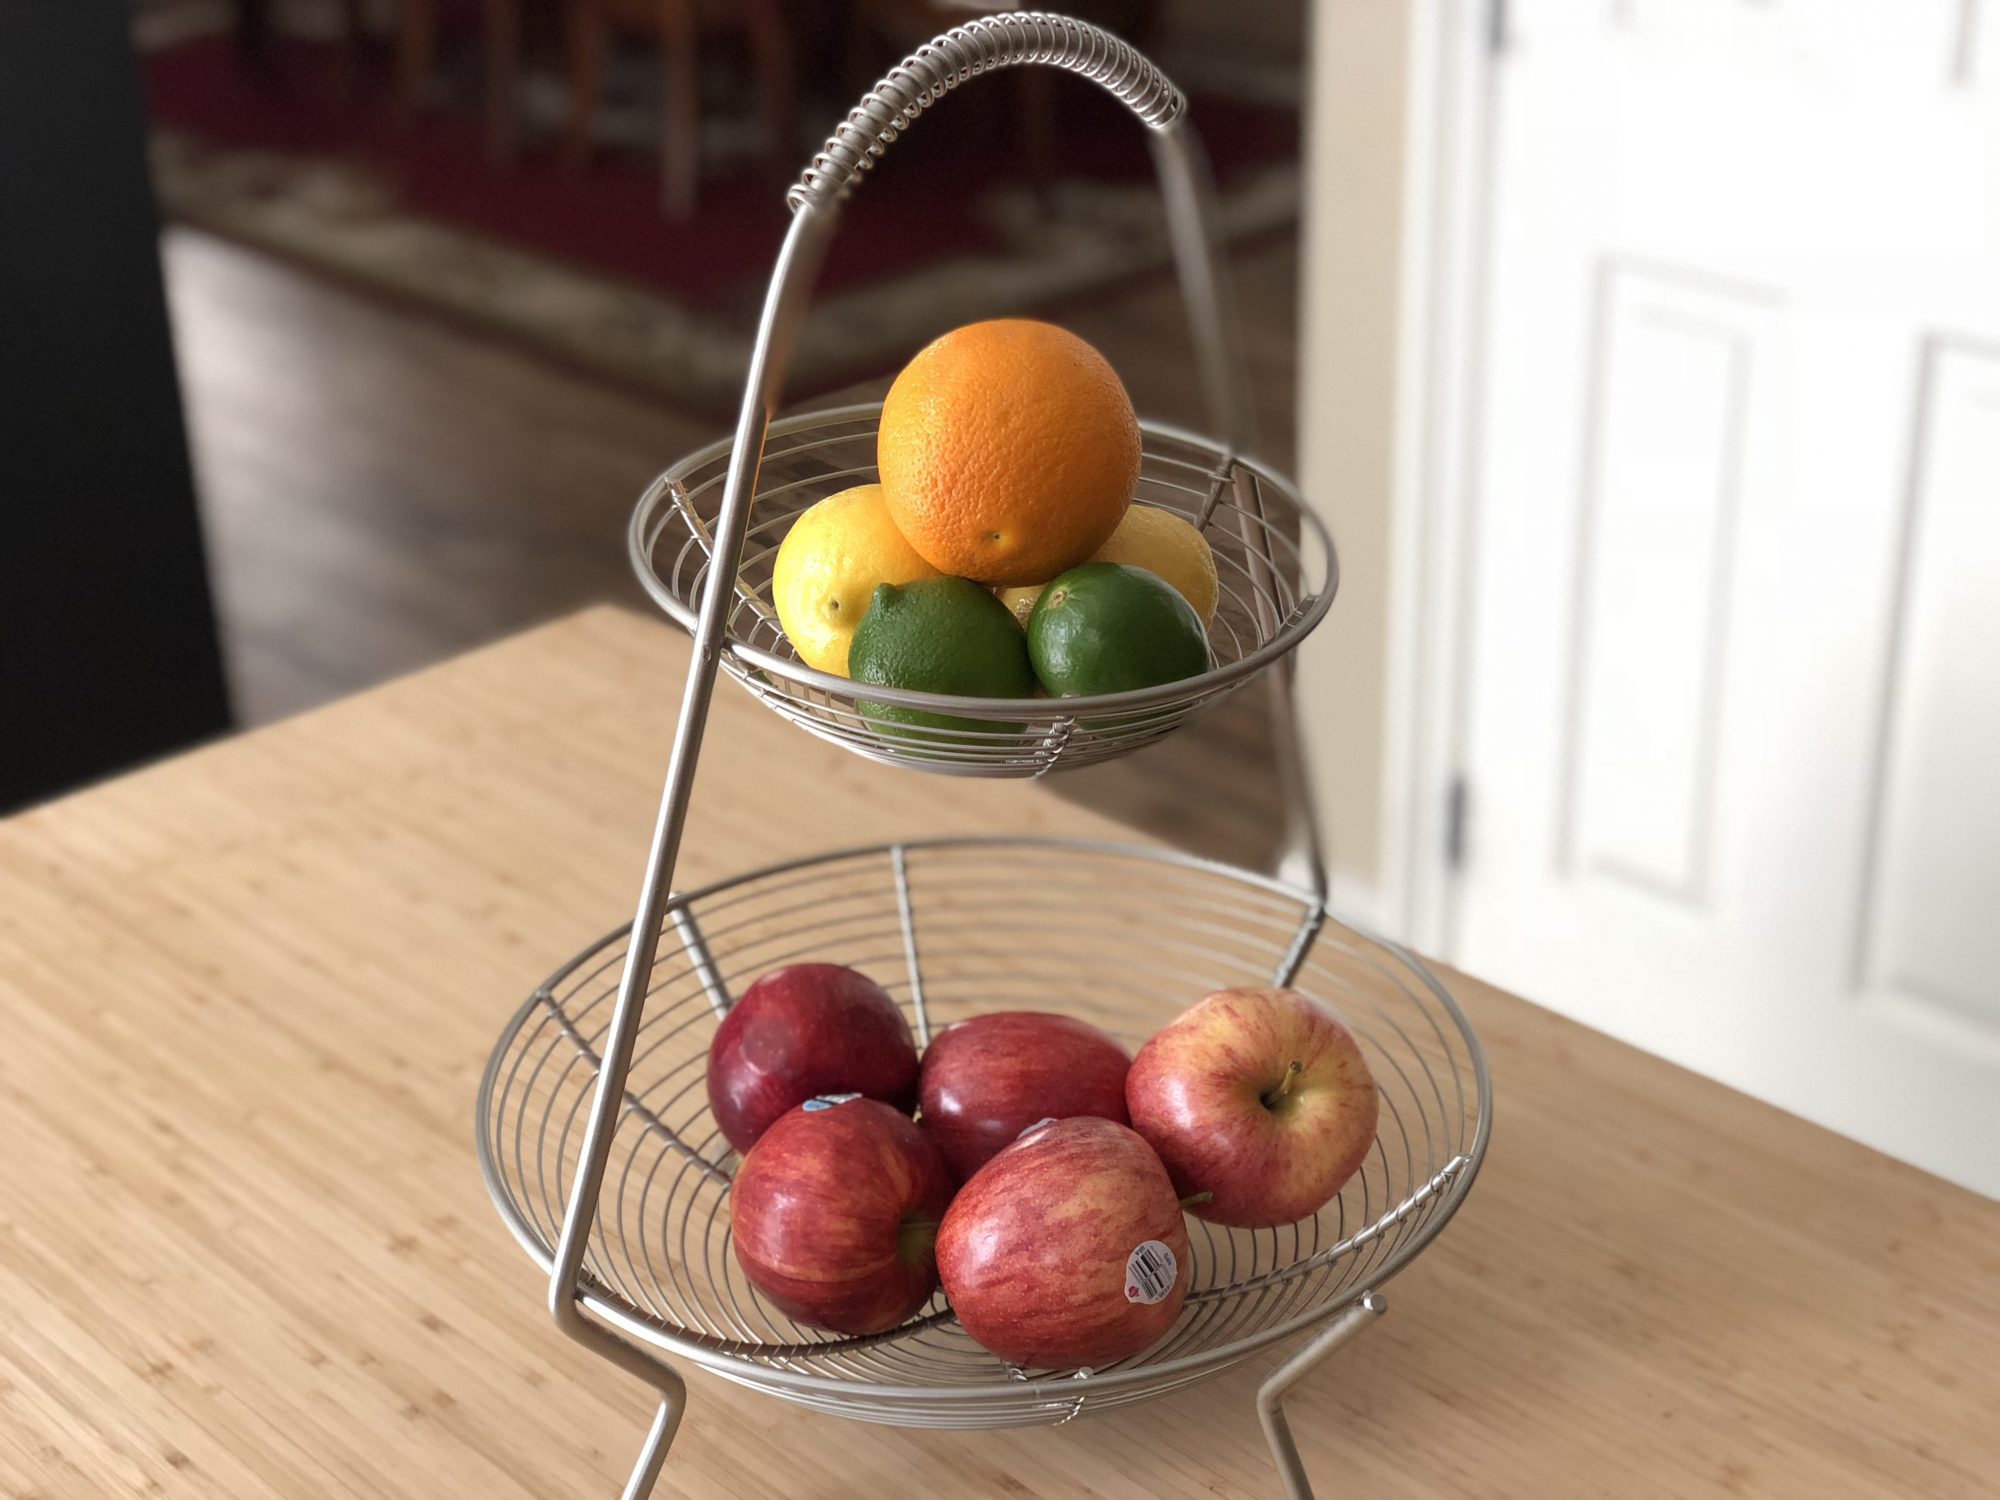
What better way to celebrate the fall harvest than to get out there in the crisp, afternoon autumn air and do a little of your own harvesting? Take a couple of bushels home and make some pie, bring one to work for lunch, throw a couple at school buses. Use the big pointy-ended basket on a stick to get the good ones up top, eat the ones that have fallen to the ground. Be sure to eat so many you throw up in between a couple of the big trees at the back of the orchard…the possibilities are endless.
There are over 22 orchards in Rhode Island that allow you to ‘pick from their bounty’ (for a small fee) and many of those actually make cider on the premises. Generally the ‘pick your own season begins on Labor day and runs through the middle of October, but with the warmer weather this summer it’s best to call ahead. As an aside, Smithfield has long been known as “Apple Country” to Rhode Islanders and still has a strong agricultural base due to the numerous apple orchards located here.
How nice!
Fall folk tales
It is said that if you catch a falling leaf before it hits the ground you’ll have 1 month of good luck. Catch 12 and the next year will be great…catch 492 and you’ll explode due to luckiness. It’s also said that the luckiest leaf of all is the last one to fall from the tree…unless you’re trying to catch that one and miss it. Then you die.
Just kidding.
You don’t die.
The Do’s and Don’t of Leaf Peeping:
Do get lost.
Do observe proper foliage etiquette. If you’re using the back roads to get from here to there as should be done, don’t turn everything into a Sunday drive of Ooh’s and Aah’s. Pull over and let the 46 locals behind you room to pass.
Do get out of your car to walk, smell and listen…
Do go to New Hampshire’s Franconia notch to see the spot where the Old Man in the Mountain used to be…don’t say hello to his vacated spot driving 13 miles per hour on route 93 north.
Do look for changing views from roads with hills and curves that meander through changing vista’s of woods and farms and small villages.
Don’t rush.
Don’t panic that ‘peak’ is passing by you. It’s constantly shifting in New England and is a continuum, not a moment fixed in time.
Moose crossing signs are there for a reason. Ever see a car that hit a moose? Ain’t much left.
Do wake up early. The colors are most vivid in morning light and dew.
Do linger to take in late afternoon light. The shadows in the hills are very, very deep.
Do look up once in a while. Mid-to-late September is when thousands of broad winged birds (raptors, falcons, hawks, etc.) ride the thermals south from the Northeast
Don’t be a color snob and ignore everything but bright red Do go beyond where everyone else goes. Vermonters have a saying. “When people die, they go to Vermont. When good Vermonters die, they go to the Northeast Kingdom.” (Northeast part of the state.)
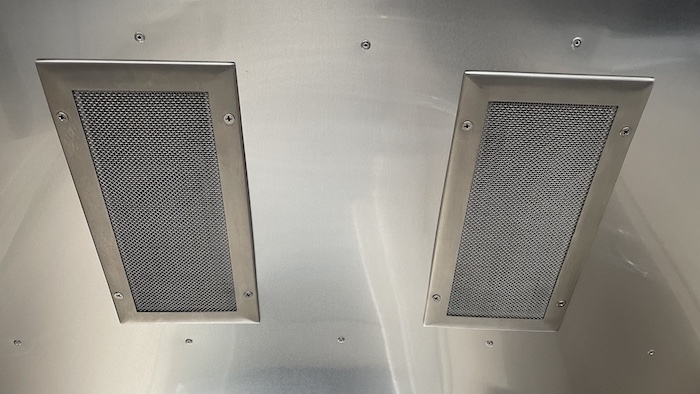
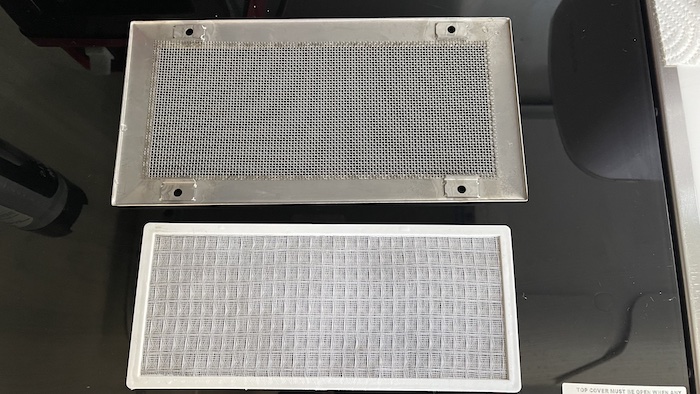
One of the things we like to do every two weeks, depending on use, is clean the HVAC system air intake filters. These filters are located in the cabin and cycle the cabin air through our Dometic air handling units. As our Airstream has two rooftop HVAC appliances that act as both air cooling and a heat pump they are used year round so cleaning is a year round task. We believe that one should regularly clean these filters. Some units recommend cleaning AC filters once every thirty days, while others recommend to do it every other week, check with your appliance manual to confirm the cleaning schedule.
Our ceiling intake vents are easily cleaned by removing the four screws holding the decorative grate in place and then simply washing both the decorative grate and the plastic filter.
2019 Airstream Hop Inn Ceiling Air Intake Vent
While the intake is open, it’s a good idea to inspect the wiring, drain hoses, and general interior for anything that needs cleaning, adjustment, or service.
Two Parts: Plastic Filter Element (bottom) and Decorative Grate (top).
Cleaning is an easy task requiring only warm water and Dawn dish soap. There are very few things that can’t be cleaned with Dawn – it’s our go to cleaner of choice for all things inside the cabin and many things outside the cabin. The clean parts should be allowed to dry fully before reassembly and use of the HVAC system.
This process takes us about half an hour every two weeks. We have four inlet vents, two per roof top unit. Sixteen screws in total.
We are looking into something like replaceable RVAir filters, which would make the air inside the coach cleaner when sealed up and running the HVAC, but we tend to open the windows and door often and are concerned that these replaceable, non-washable, filters will gunk up faster and no longer be an economical alternative to the factory filters…but you never know, we could try them and like them…
It’s been a heck of a pandemic all around, and it’s not over yet. Sean and I are fully vaccinated and many places are opening back up to near pre-pandemic capacities. We’ll be wearing masks in public places and avoiding large gatherings for the time being. Once the country reaches 75% fully vaccinated and international travel is possible I might ease up on mask wearing, but for now I feel better wearing a mask in public.
With the end in sight, more of my customers are opening their doors to vendor visitors, meaning back to traveling…
This week we’re in Tulare, California visiting some food quality labs. Next week we’re heading west to Gilroy, California for the heck of it. Week after we will be in the Bay Area visiting friends and working with clients. After that it’s back to construction before the next big thing…
Back in November when we purchased our backhoe we got a tip on mobile power from the prior owners. They told us to check out BidIndustrial.Com as the site was auctioning off several thousand mobile solar generators built by DC Solar before DC Solar was proven to be a scam and forced into bankruptcy liquidation.
After some mental debate we settled on a Configuration C mobile solar generator on which to bid:
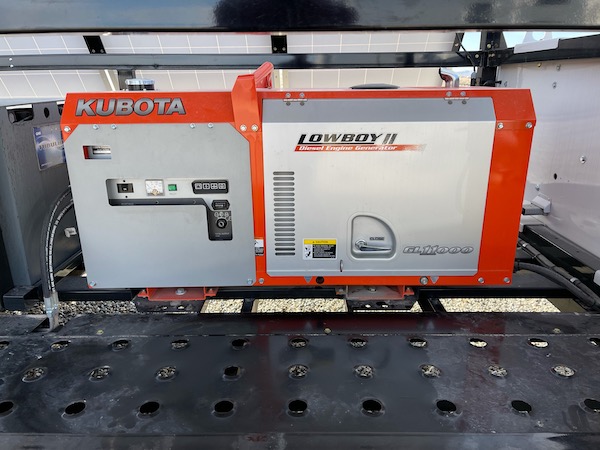
MSG (mobile solar generator) with Kubota GL11000 Lowboy II, 11KW diesel generator with super low hours! 96 GNB Flooded Classic Platinum tubular industrial batteries 468 AH capacity 48 volt, ECI 113 gallon fuel tank with locking cap and gauge, (10) Talesun Solar Module Type: TP660P-235 235 watt solar panels, (2) SMA Sunny Island model 6048-US-10 single phase battery inverters, MidNite Solar Classic 250 charge controller, MidNite Solar MNGP Classic controller display, MidNite Solar Photovoltaic Combiner breaker box, Homeline Load Center breaker box, (4) 110 volt plug ins, (2) Hubbell 220 volt output plugs, Carson 9,995 lb. GVW tandem axle trailer with electric brakes, pintle hitch.
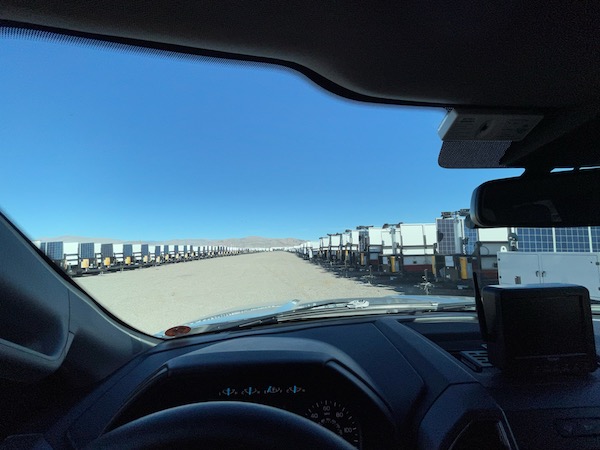
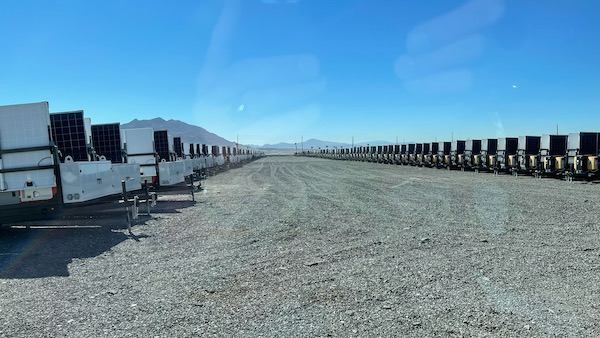
One January Day I went to the Las Vegas Motor Speedway and selected six candidates from the available pool – there were many – that were in top condition.
During the last minutes of the auction bids were flying back and forth extending the auction time beyond the end by fifteen minutes. When it was all said and done I was the proud owner of one of the six candidates I had reviewed.
After picking up the payment, a truck, and hitch conversion I headed back to the Speedway to collect my prize.
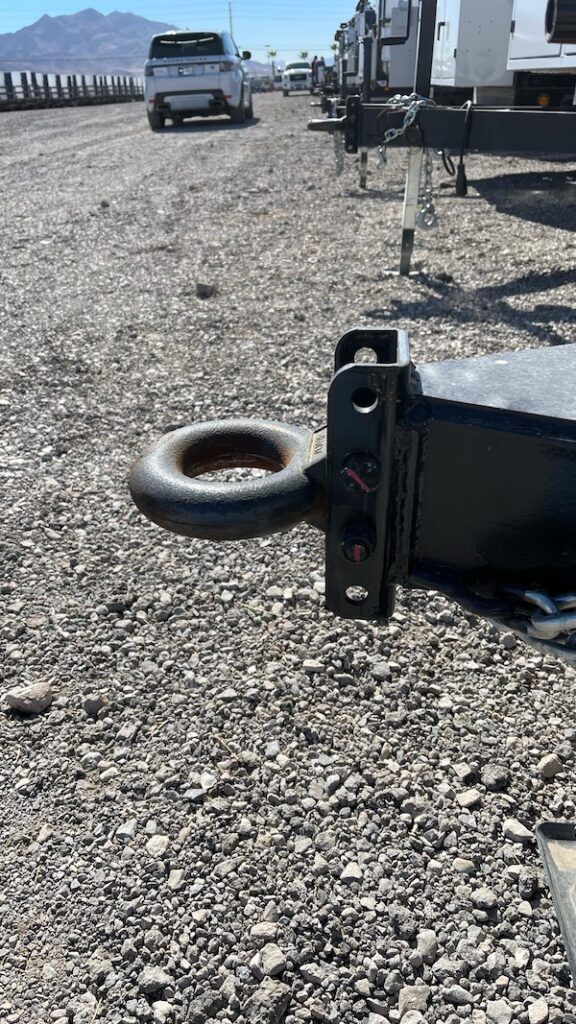
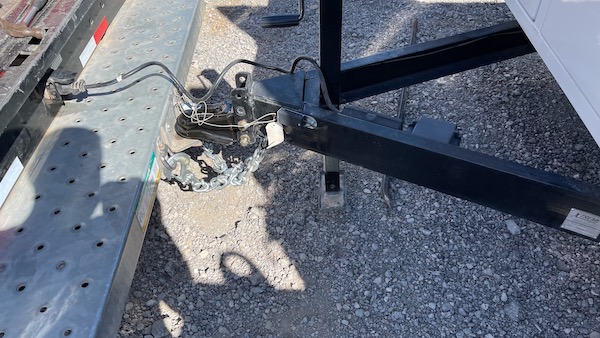
The first thing I needed to do was to swap out the pintle hitch for a standard ball capture hitch.
All of these MSGs have pintle hitches from the factory. My truck only has a ball hitch, and the rental truck also only has a ball hitch. So with my tool box and a conversion kit I hit the nuts. A little muscle and some leverage later and my new ball capture hitch was installed.
All that was left to do was to back the truck up to the unit, hitch up, and take off!
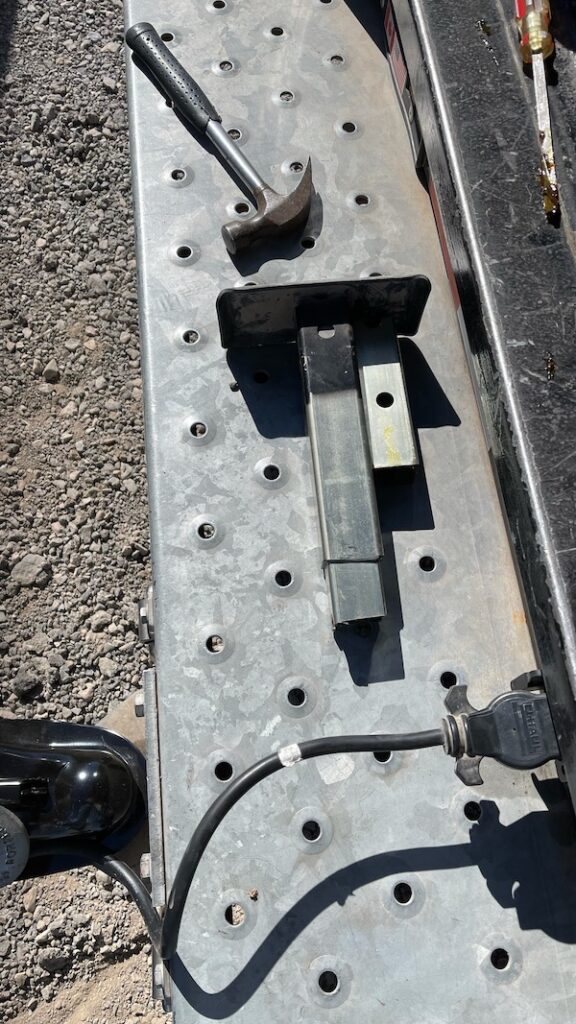
Except the jack wouldn’t go up all the way…
The jack foot would only go up about four inches… That’s not safe…
Welp, a broken foot would normally be a show stopper – but enter the cut off wheel.
A few minutes later and I’m on the road.
Jack Foot Removed…
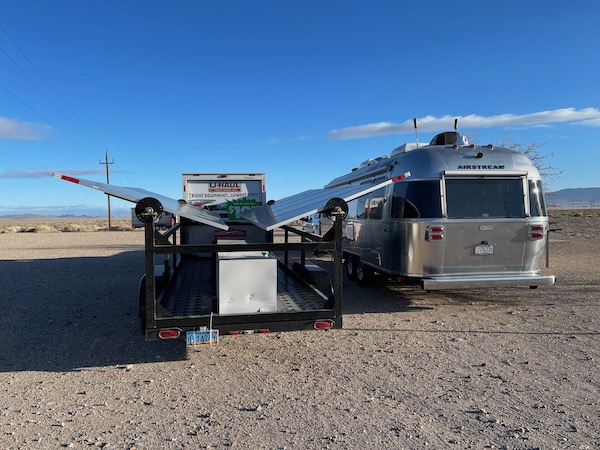
The next day we headed 520 miles north to our land with an overnight at Miller’s Rest Stop.
The MSG provided plenty of power for the night. We did top off the batteries with water so that they could charge in the sun the next day.
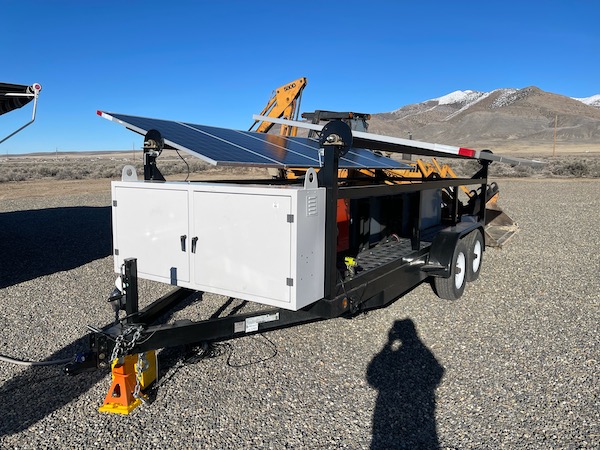
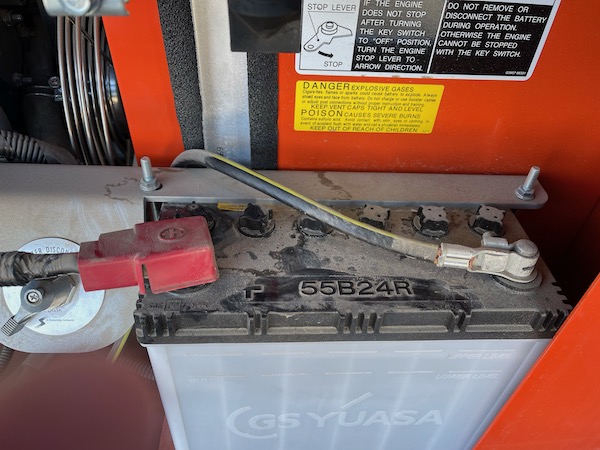
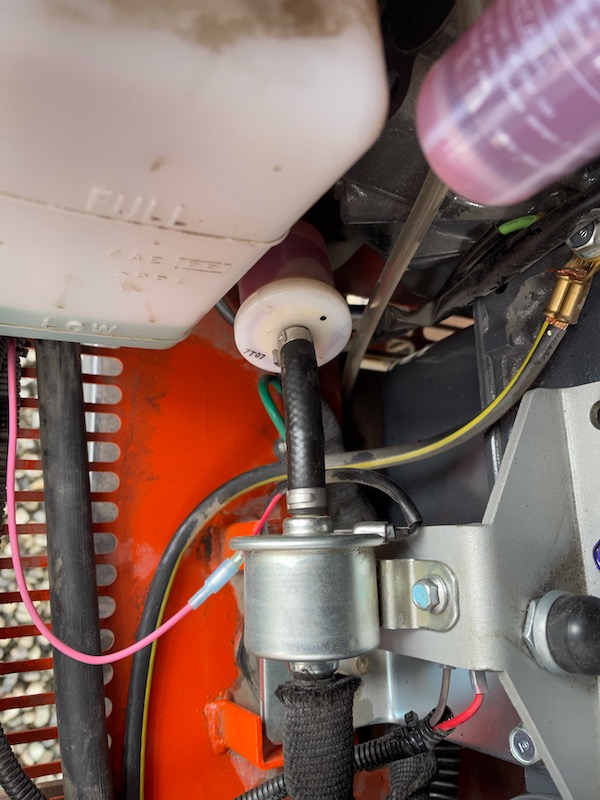
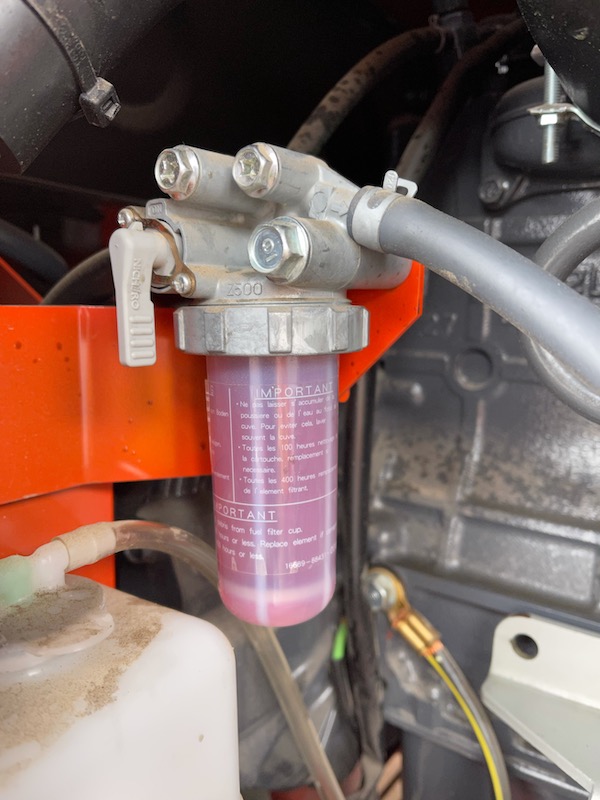
Once on our land we deployed the panels, hooked up the camper, and set about to servicing the generator that came with our MSG. We needed several things: diesel fuel, oil change, a new starter battery, and new fuel filters.
As well as lots of reading on how these things work.
Now the unit is happy as a clam.
Next we started digging into what’s on this thing and this put a smile on our faces. Looking at the auction listing we expected 468 AH of batteries. In reality the unit had two 540 AH battery banks for a total of 1080 AH capacity! The auction listing also mentioned that the solar panels were 235 watts each for a total of 2350 watts solar collection. A quick look at the panes and they are 270 watts each for a total of 2700 watts solar collection.
We both thought it was a good deal as posted, but getting more battery and more solar collection is good news!
I’ve downloaded all the manuals and have been reading up on how all the parts work. Simple enough, but can do a lot more than just provide power from the sun.
I also priced out all the components and it would cost roughly $36,000 to build this unit today. I paid less than half of that.
As you may recall from earlier posts, we accepted delivery of our Airstream travel trailer back in August of 2019. Since then we have put over thirty-thousand miles on our coach and over forty-one thousand miles on our tow vehicle.
During that time we have given very little thought to our tires other than inspecting them before and during trips, keeping the air pressure at the suggested level for both vehicles, and covering the camper tires when in the same place for more than a few days. We also use a tire protectant spray every two thousand miles. So I guess we do give more than a little thought to our tires.
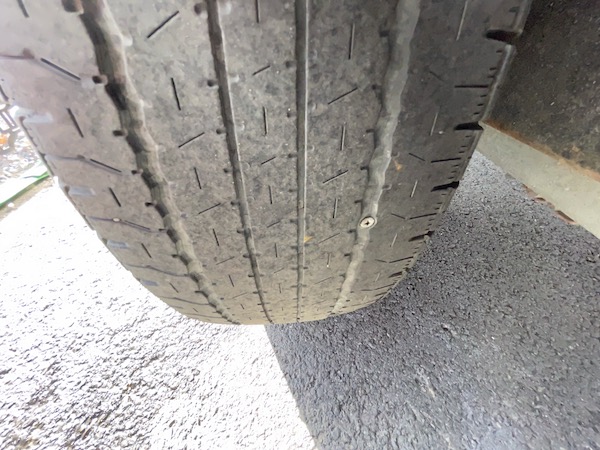
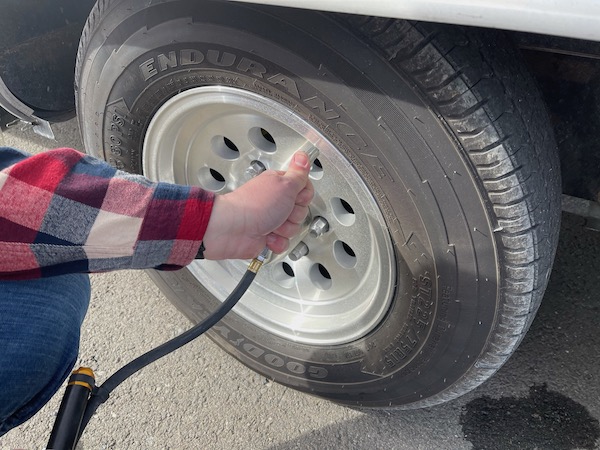
Last week, when preparing to move from an RV Park to our own land, I noticed one of the tires was looking low. I had just checked the pressure a few days ago before we arrived at the RV Park, so this was troubling. Very troubling as the usually 80 PSI tire was down to 65 PSI.
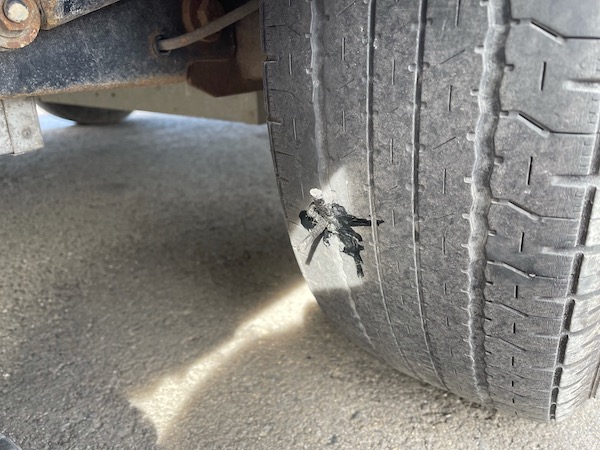
Upon closer inspection I found a small screw embedded into the tread of the tire.
Somewhere along the way we picked up a screw in the inside valley of our tire tread.
Luckily I have experience with small punctures such as this, and the screw was in a location that was easily repairable without removing the tire from the Airstream. This picture also tells me that the tire is wearing a little unevenly and, as we will see in other photos, it’s time to order a fresh set of tires for our coach. Back to the repair…
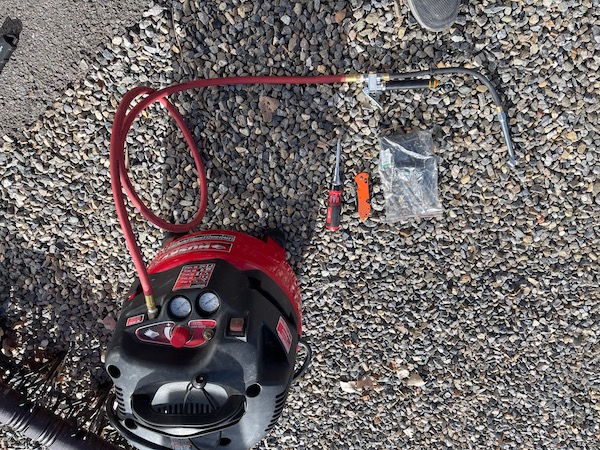
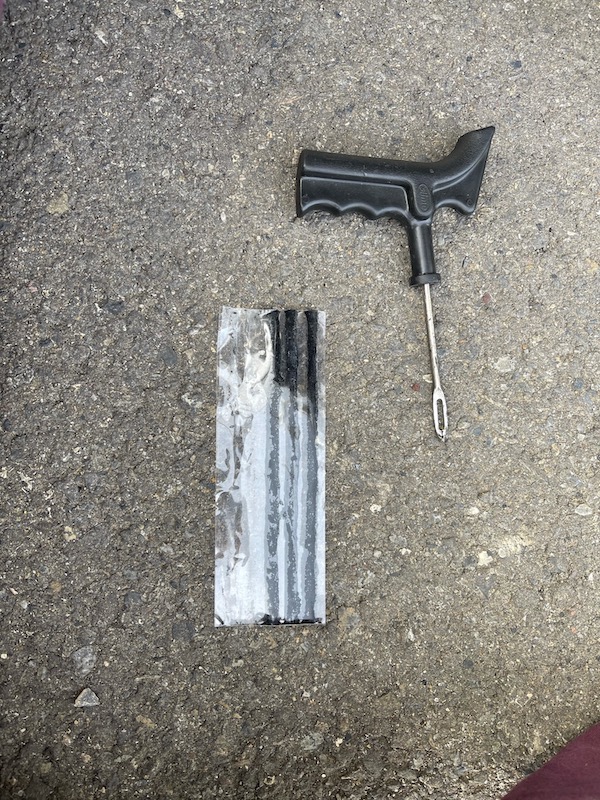
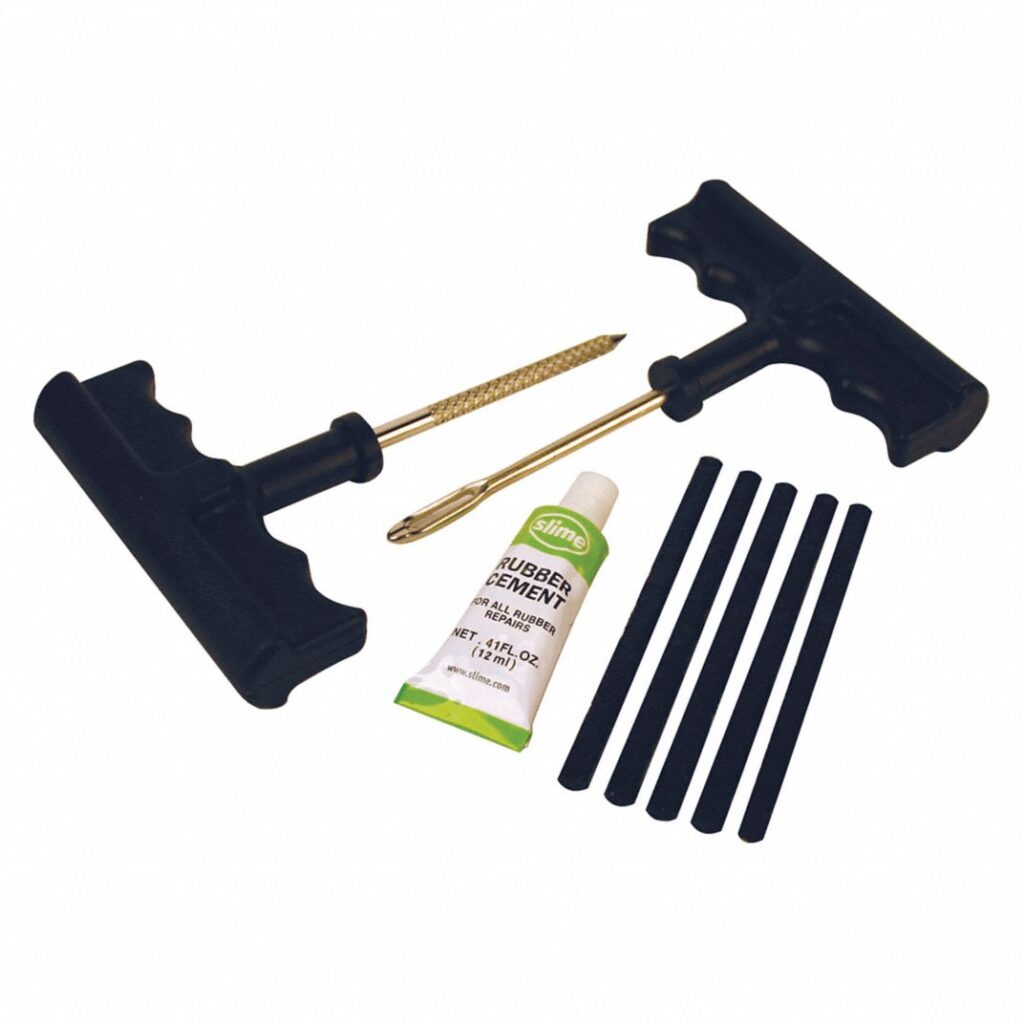
The tools required to plug this kind of puncture include:
A screwdriver to remove the offending screw (a pair of pliers would also work)
A plug kit (I use the Slime branded kit)
A razor knife to trip the plug flush to the tire
A compressor to inflate the tire
The only tools needed to repair this kind of puncture.
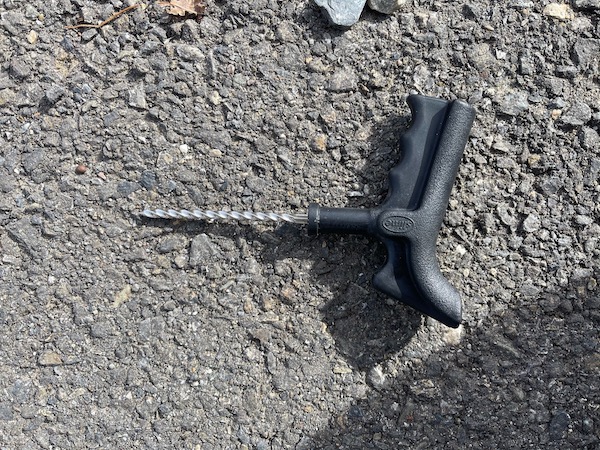
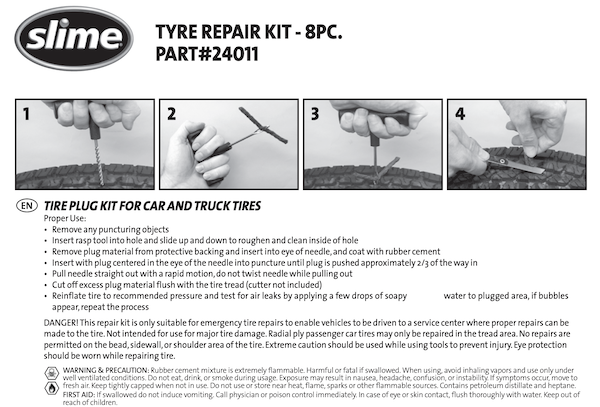
Step One: Remove the offending object.
Step Two: Clean out the puncture hole using the abrasion tool provided in the kit.
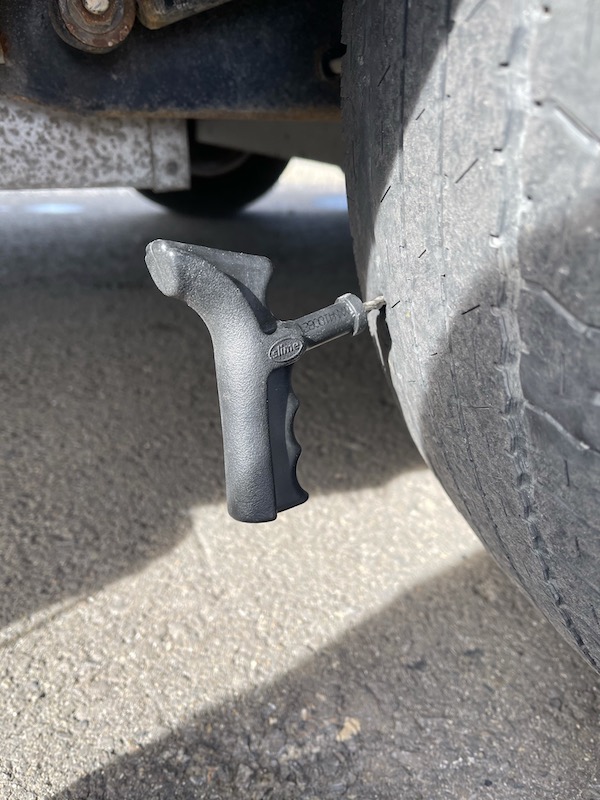
Step Three: Thread a plug through the needle tool provided in the kit and coat with rubber cement.
Step Four: Plug the tire and quickly pull the tool back through the hole.
Step Five: Inflate the tire and check for leaks.
Step Six: Trim the Plug flush to the tire.
It’s Just That Easy…
We will be monitoring the tire pressure for a few days to ensure that the plug is holding air.
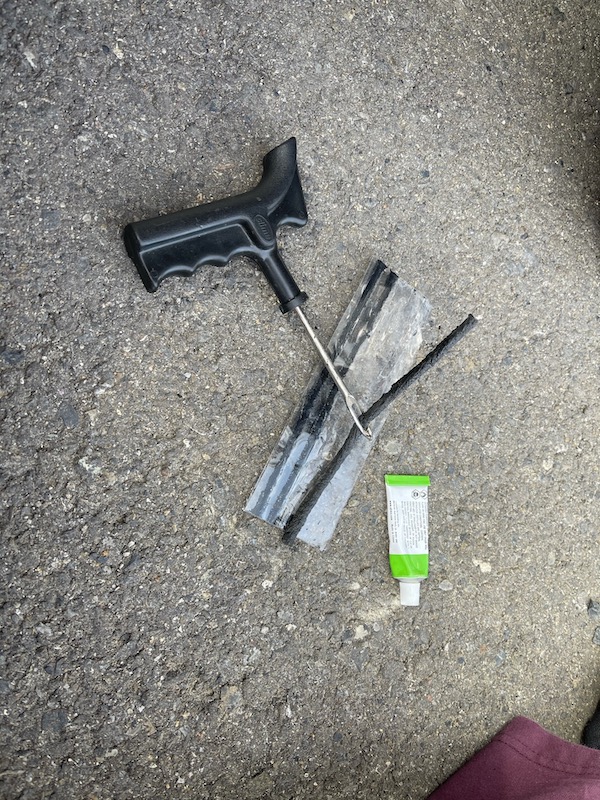
Slime Plug Kit
Instructions from Slime.
Tire plugs aren’t hard, but there are some disadvantages to running on a plugged tire. Most tire manufacturers don’t recommend taking a plugged tire to the maximum speed or temperature rating of the pre-plugged tire. Plugs should only be used to repair a tire when the puncture is within the tread and less than ¼” in size. Also note, that patching a tire yourself may void the warranty.
One should never attempt to plug or patch the sidewall of a tire.
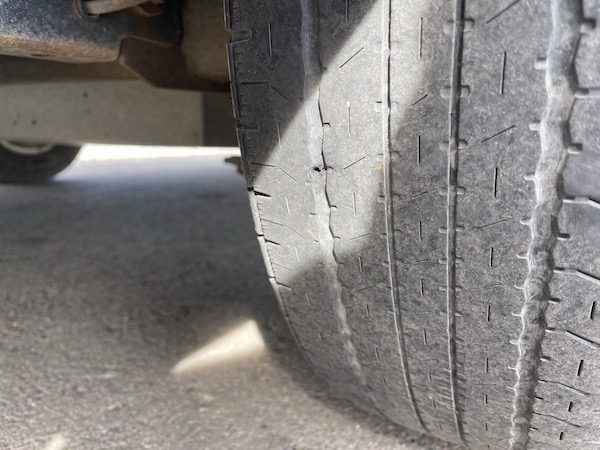
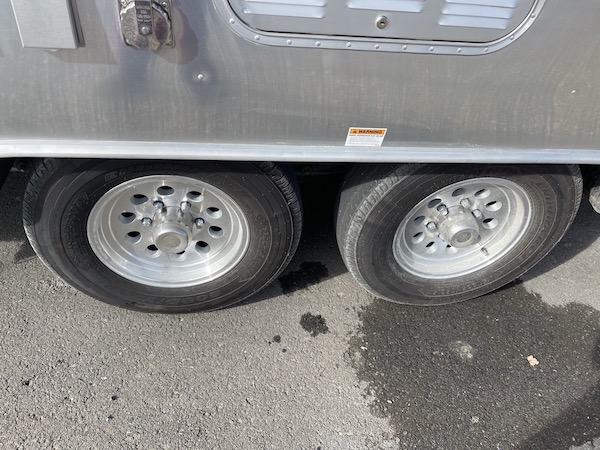
Given that we have over 31,000 miles on these tires and they are showing uneven wear on the inner tread as well as dry rot on the sidewalls near the start of the tread, it’s time for new tires. We’ll be upgrading to Carlisle trailer tires on all four wheels.
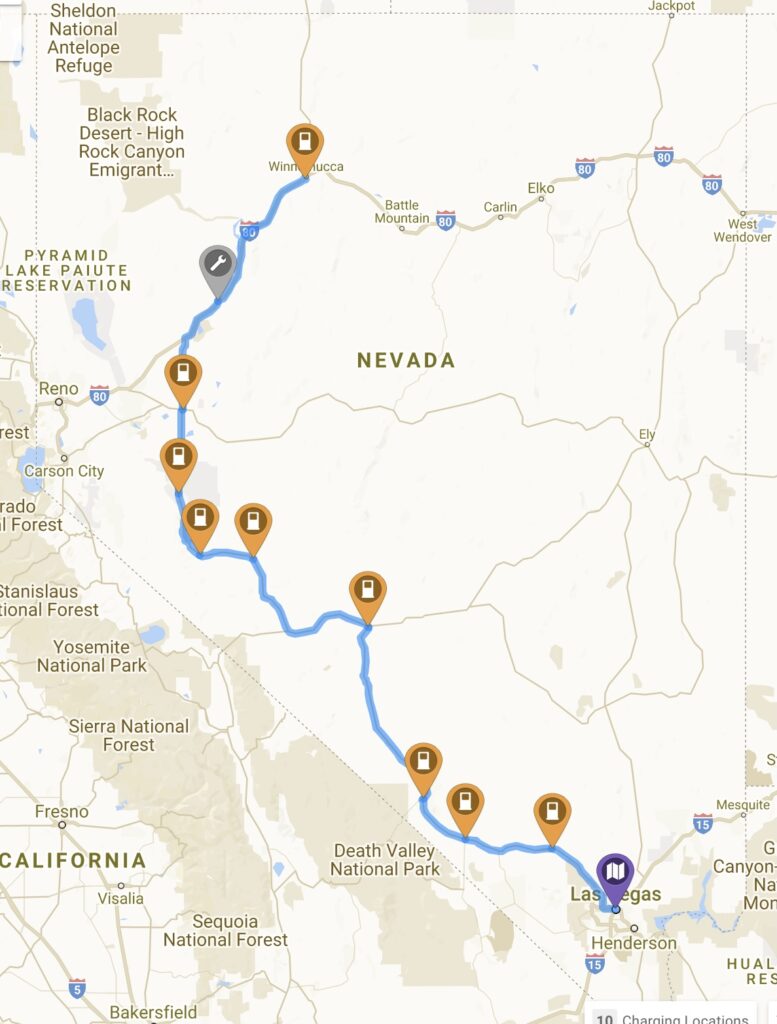
Las Vegas, Nevada to Winnemucca, Nevada – 520 Miles
Back in August last year Sean and I purchased about ten acres up in northern Nevada. Our plan is to develop the land into our own little slice of paradise including guest cabins, recreational vehicle parking, a massive communal kitchen, and laundry facilities. We have already acquired a backhoe, broke ground, and have started the process of having a well installed for water, electricity dropped from the pole, and ideas for our septic system. It’s all coming together…slowly.
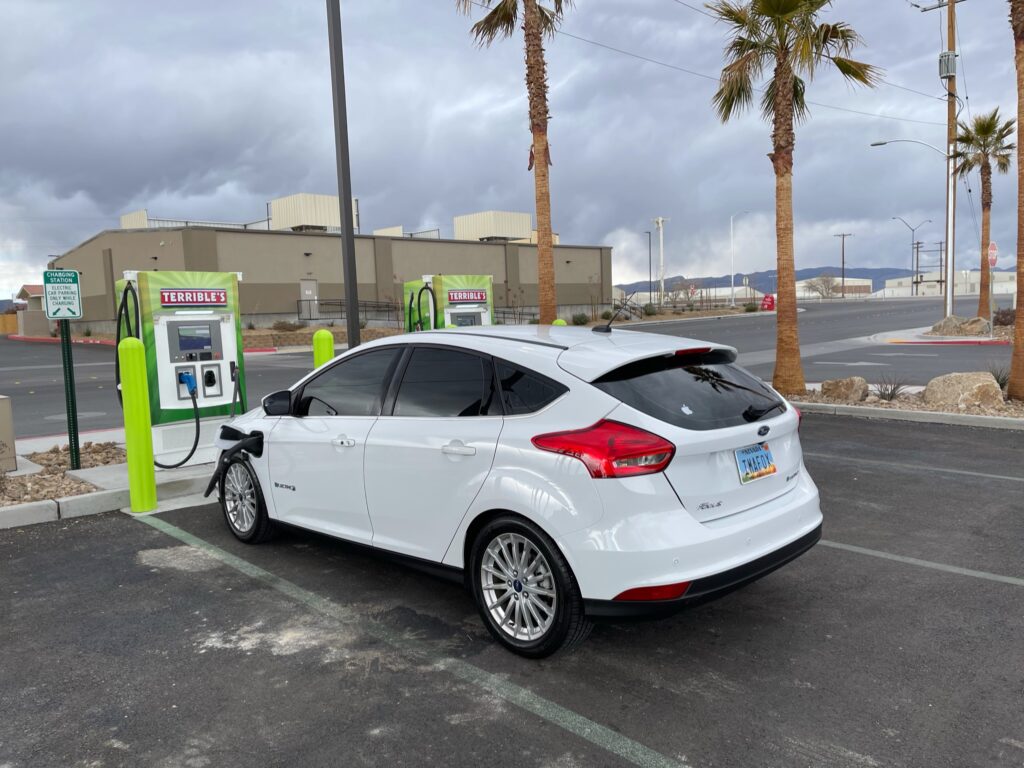
That said, we decided that having our Electric Ford Focus down in Vegas where it makes short six mile round trips daily, while we are in town, didn’t make sense anymore. Up here in Winnemucca, it’s eleven miles to the nearest grocery store, twenty minutes from the shopping districts and there is a DC Fast Charge (DCFC) station in town. Given that we need to run into town to get essentials like food, water, fuel for the generators, fuel for the backhoe, it just made more sense to have the electric vehicle here.
Indian Springs, Nevada DCFC The week before our trip.
DCFC stations are located every fifty miles or so along the proposed route. The week before setting out on our adventure we drove out and back to the first charge station to make sure that it was working and to make sure that the range reported by our Ford Focus Electric was accurate. It was working and the range was accurate.
For the next three days I plotted routes to ensure that we could make the trip. Of course we had a Plan B in our back pocket the whole time. As we need a place to stay and, given the current global pandemic, hotels are right out, Sean was going to follow me in the F150 pulling our Airstream as well as our generators.
I chose this round because there were more DC Fast Charge Stations than the shorter, Battle Mountain Route.
The proposed route isn’t the shortest, it’s about forty miles longer than running up Battle Mountain, but it has far more DCFC charge stations, so it was selected.
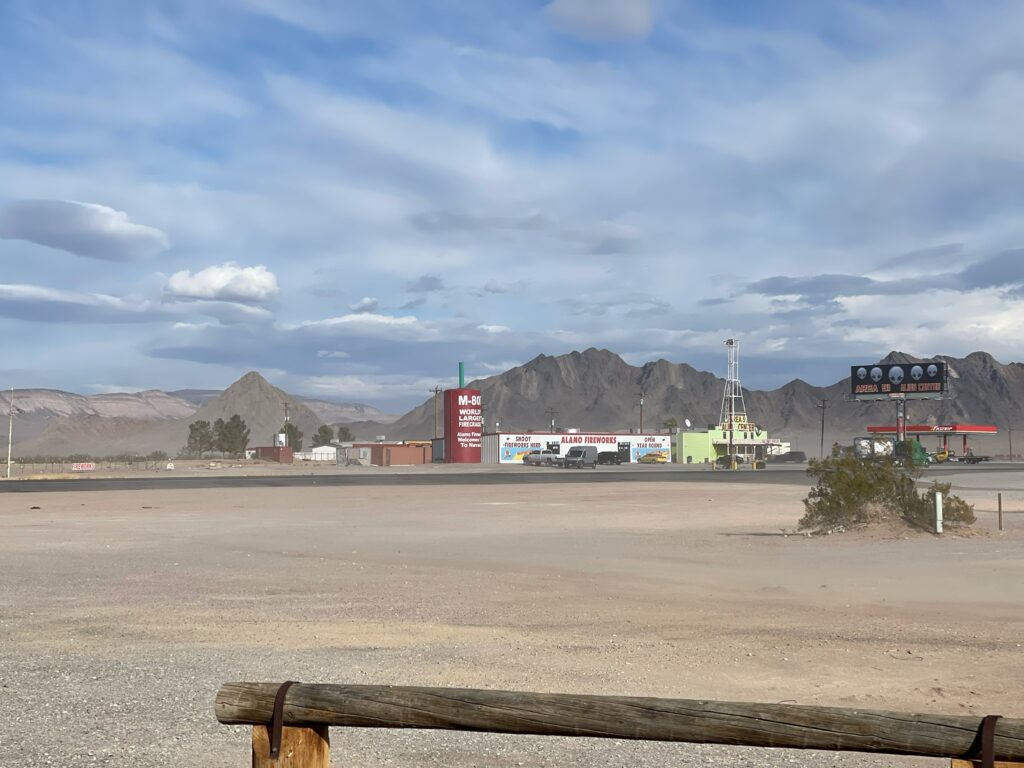
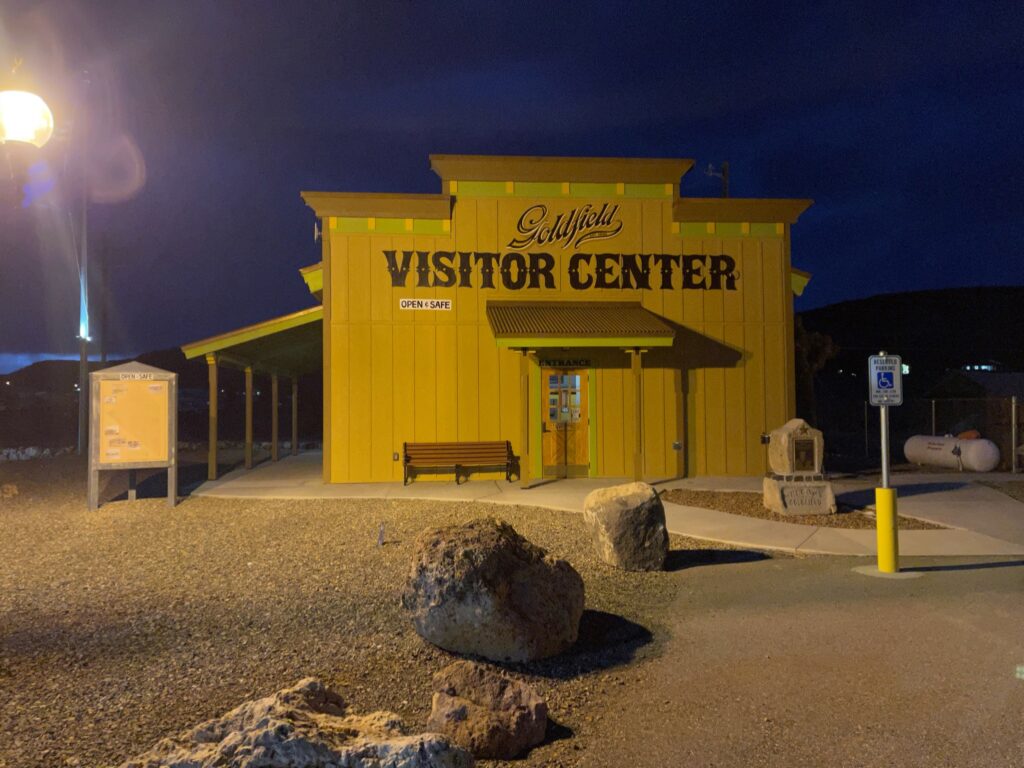
I left a few hours before Sean so that we could meet at our first overnight in Goldfield, Nevada – four DCFCs from Las Vegas (not that I would need them all, but it’s nice to know they were there).
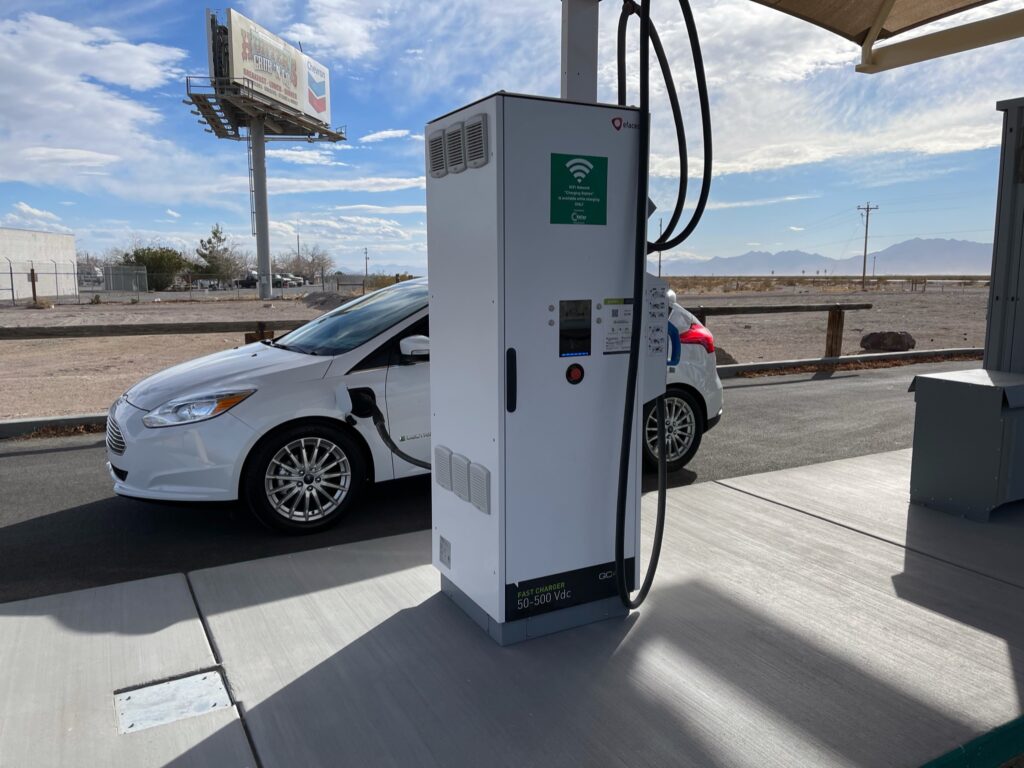
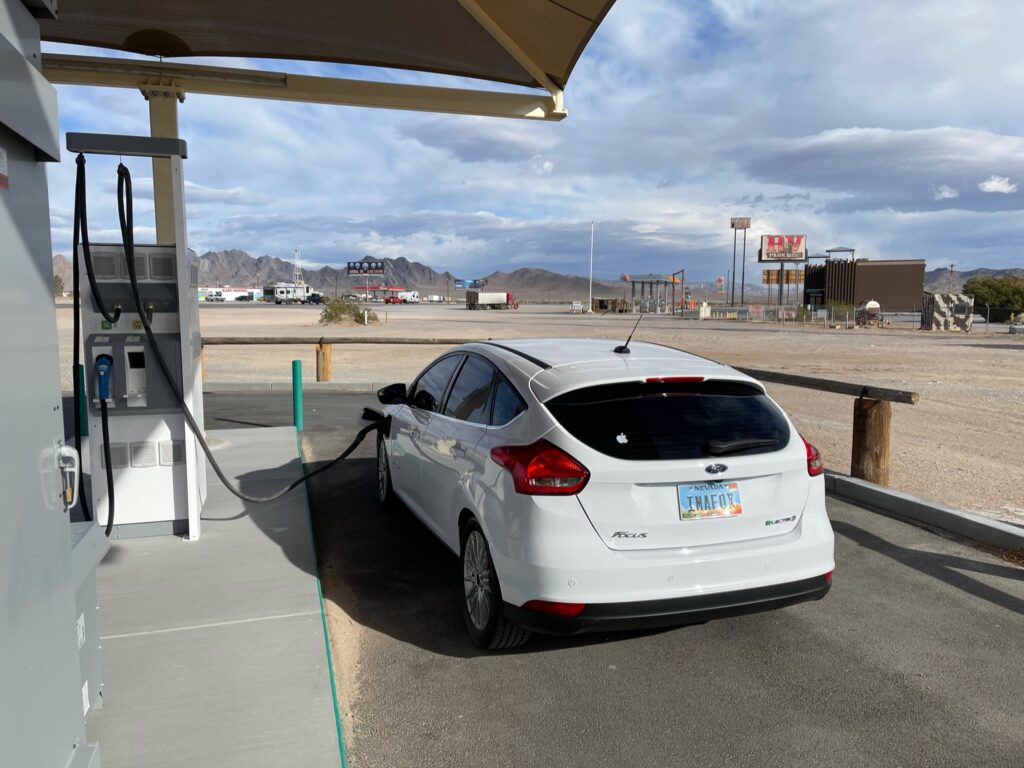
My first stop was in Indian Springs as I knew the DCFC worked, having tested it the week before. I only stayed here a few minutes to take a picture (see previous) and top off before heading to the Amargosa Valley Rest Area’s DCFC – again mostly for the photo opportunity as the vehicle had enough charge to make it to Beatty.
Amargosa Vally Rest Area and Beatty DCFC
Beatty is pretty cool as they have this massive candy shop called Eddie World, which I love!
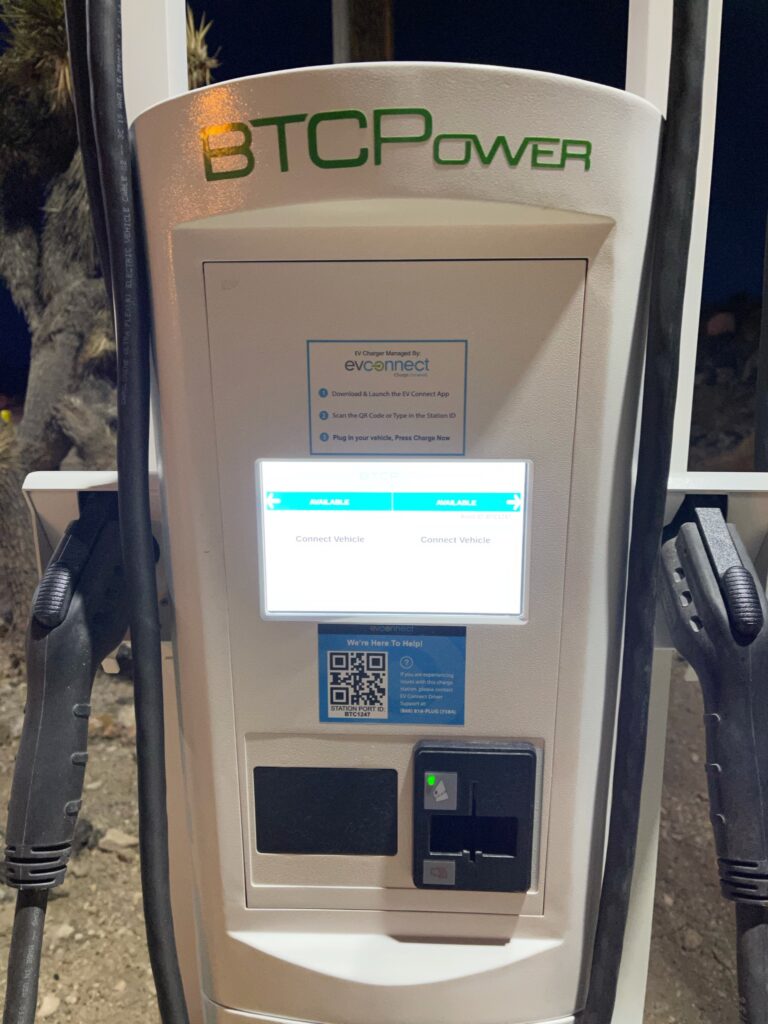
The next leg out the journey was one hundred miles. This was a test of the battery capacity as there were hills and wind… I did make it to the Goldfield Visitor Center and their DCFC safely with a few miles to spare.
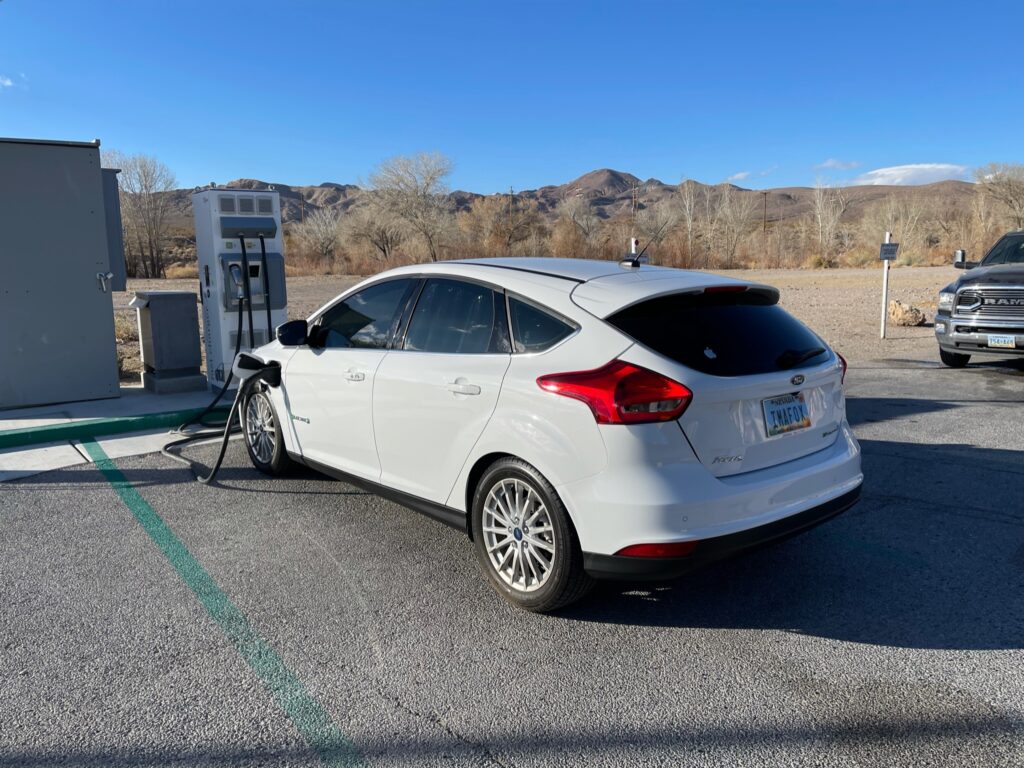
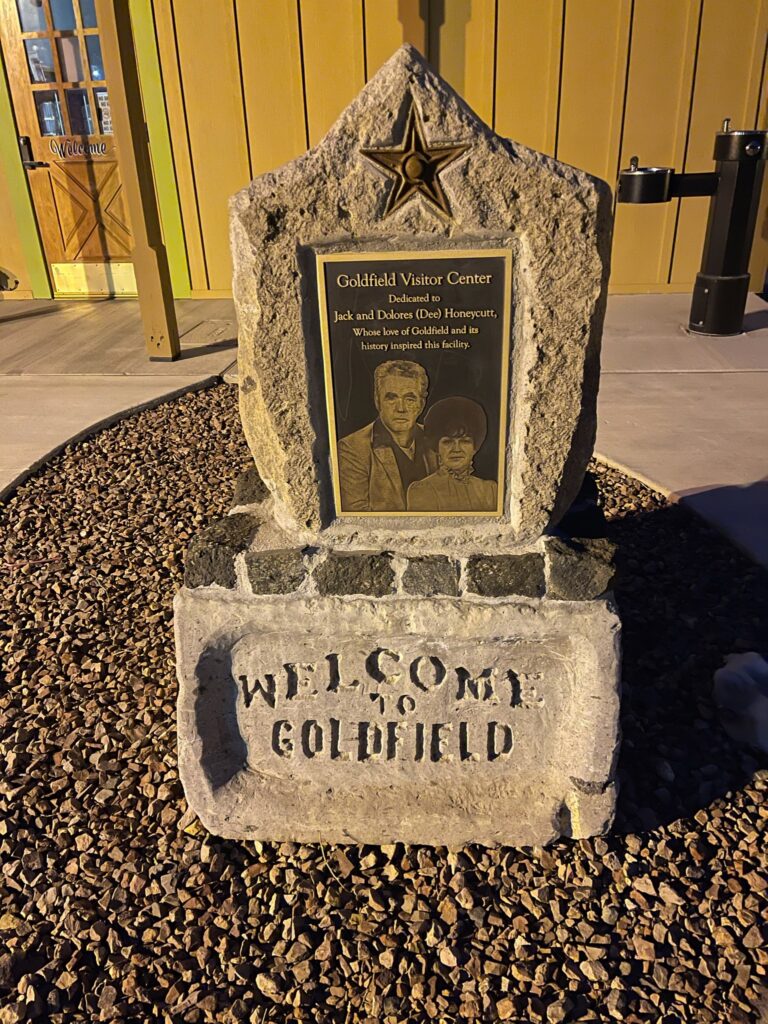
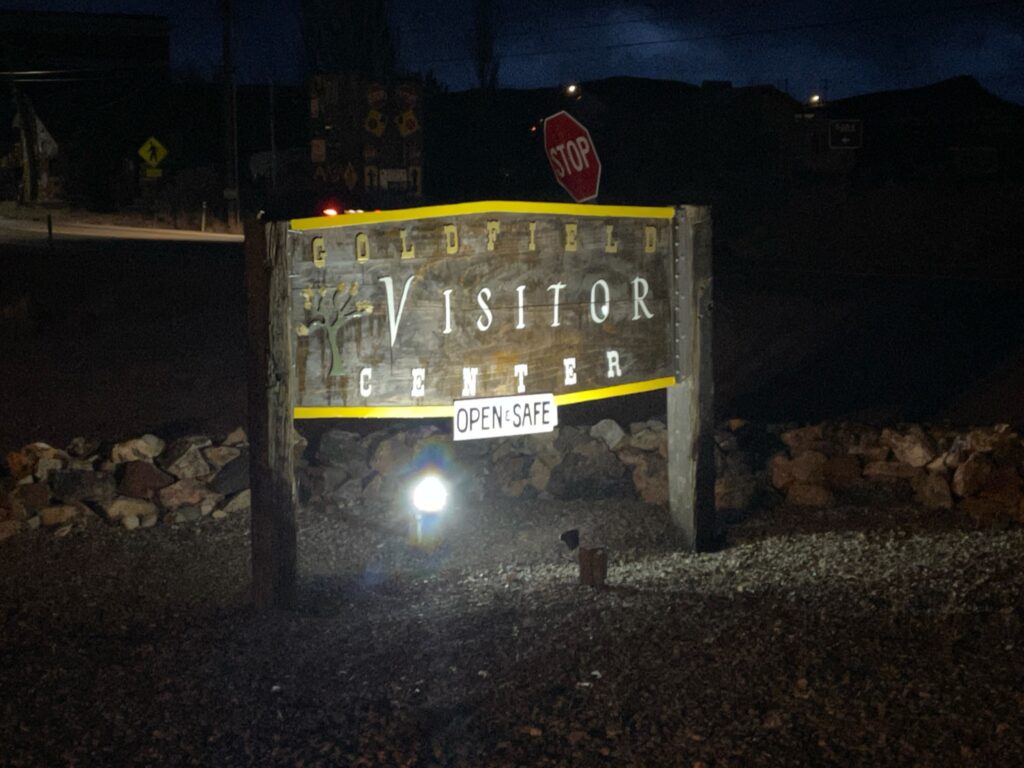
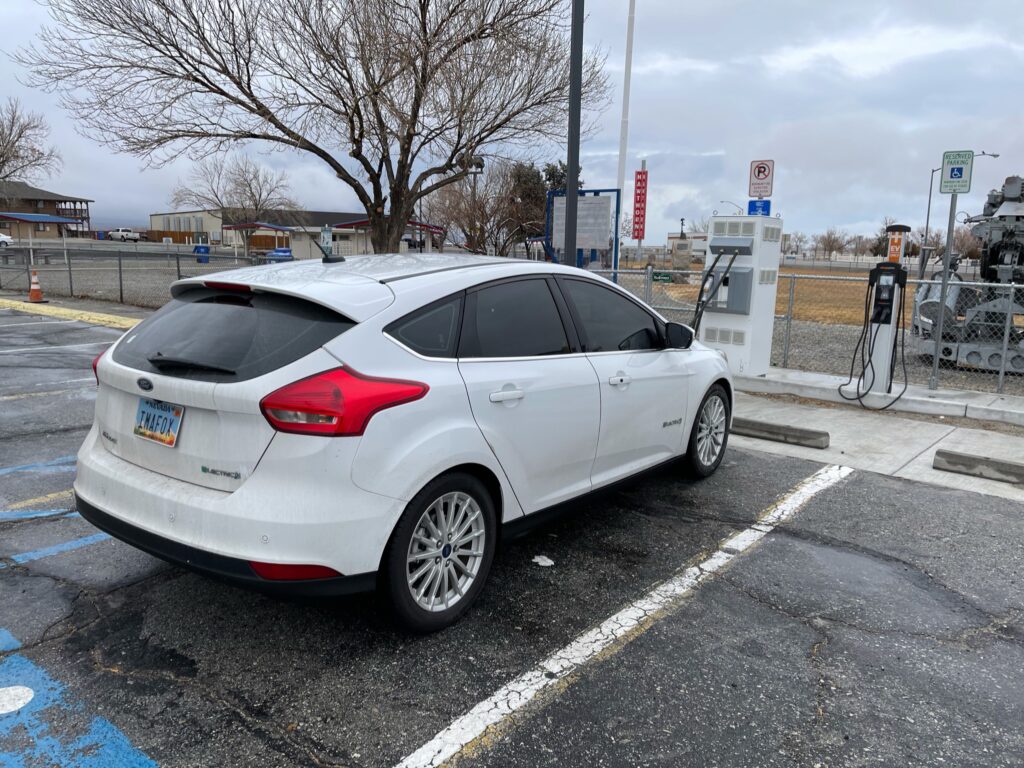
Goldfield Visitor Center
The charging process took about forty-five minutes. As luck would have it, this was the exact time it took for Sean to catch up to me, and we both head to our overnight RV Park together.
After setting up camp, we plugged the car so that it would have the cabin temperature ready for for Saturday’s drive.
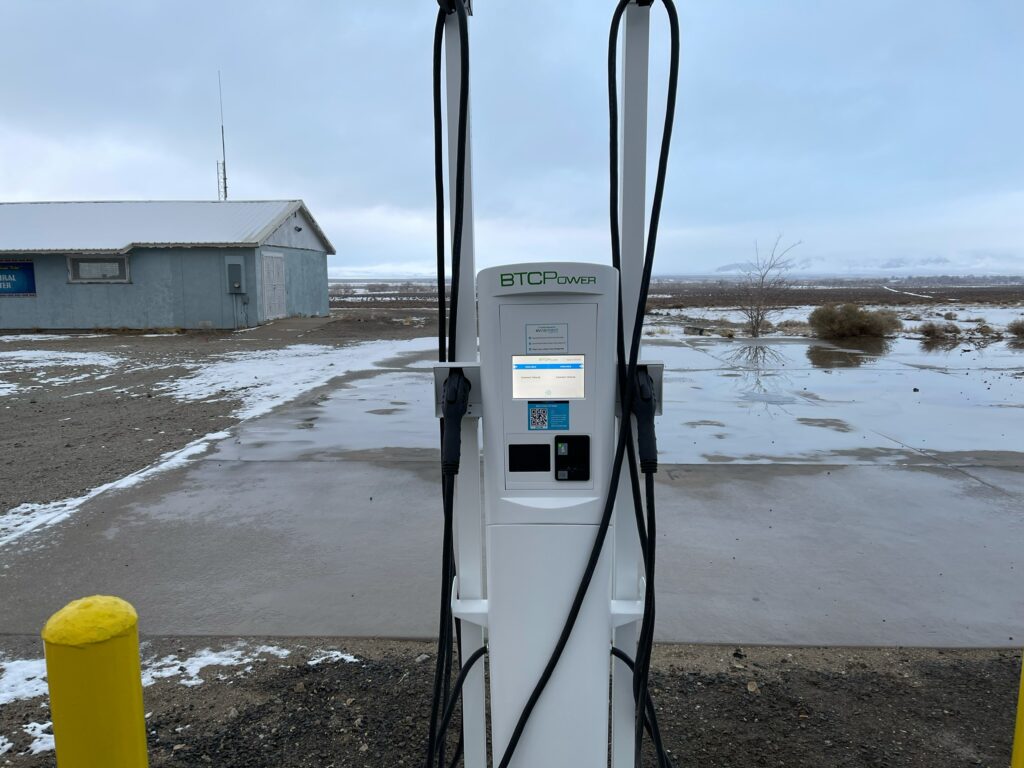
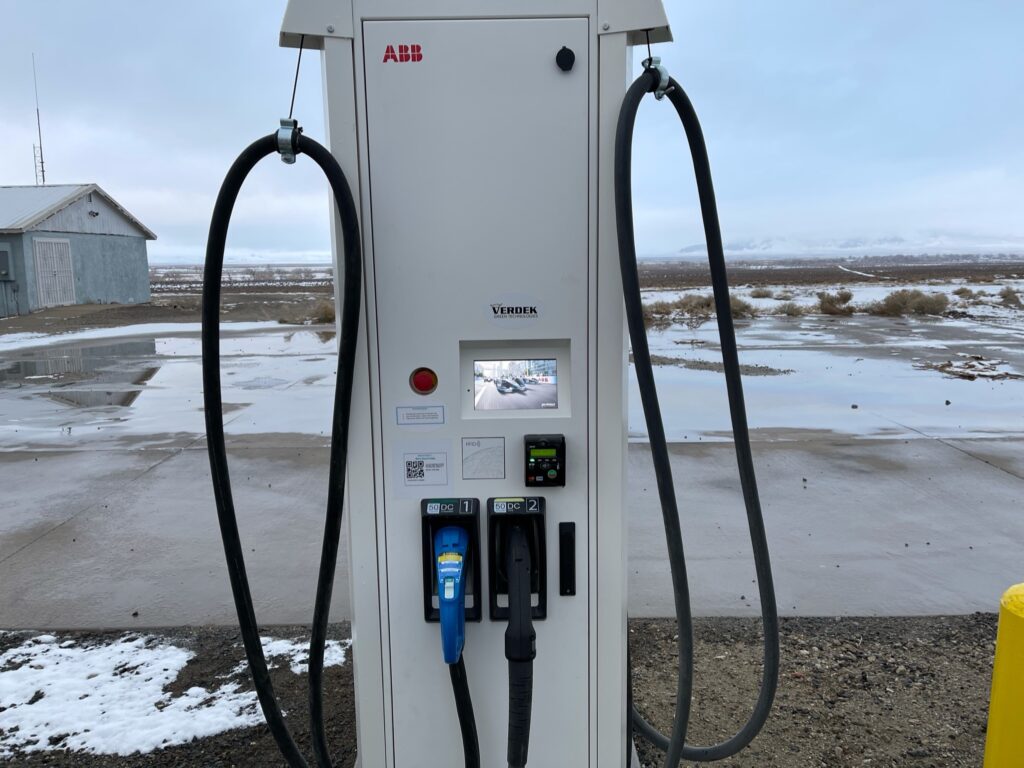
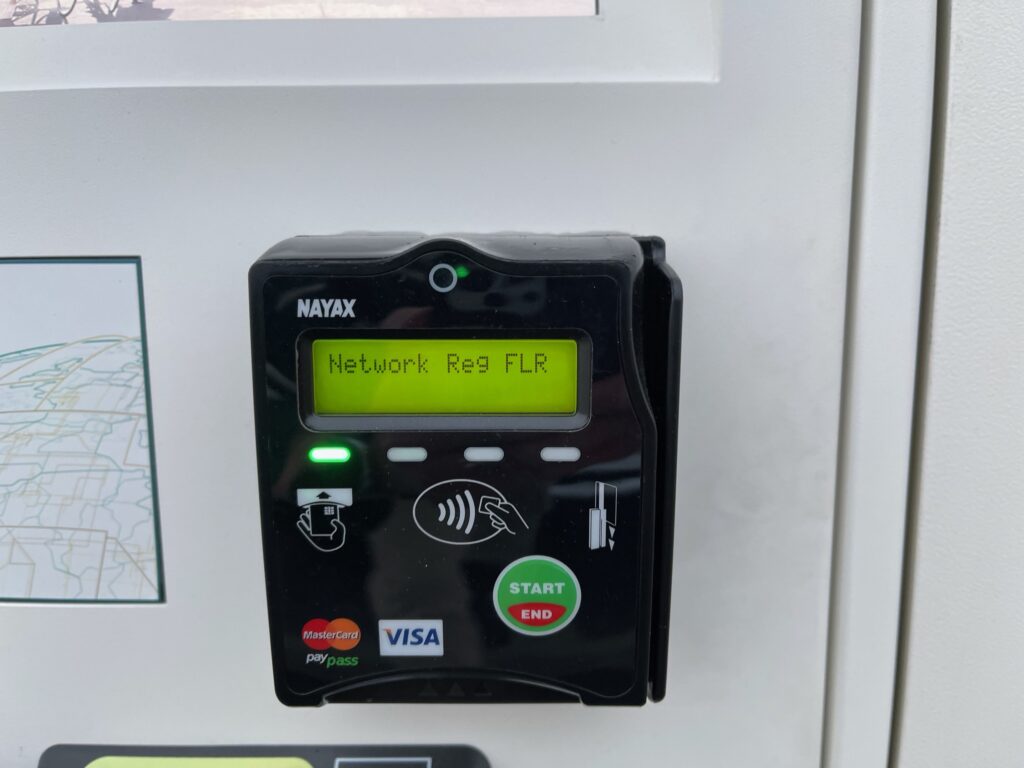
Saturday was to be the big day, starting with an eighty mile drive to Tonopah and their DCFC station. This went off without a hitch. The next station, the Lunning Trading Post proved to be problematic as the station had no connectivity and with no connectivity, no ability to initiate a charge session.
This is the first time our little Focus has driven in snow. Tonopah DCFC.
Inoperable Lunning Trading Post EV Connect Station. DCFC not shown, same error but in a smaller screen.
This proved problematic as I was short several miles to the next DCFC. Enter Plan B.
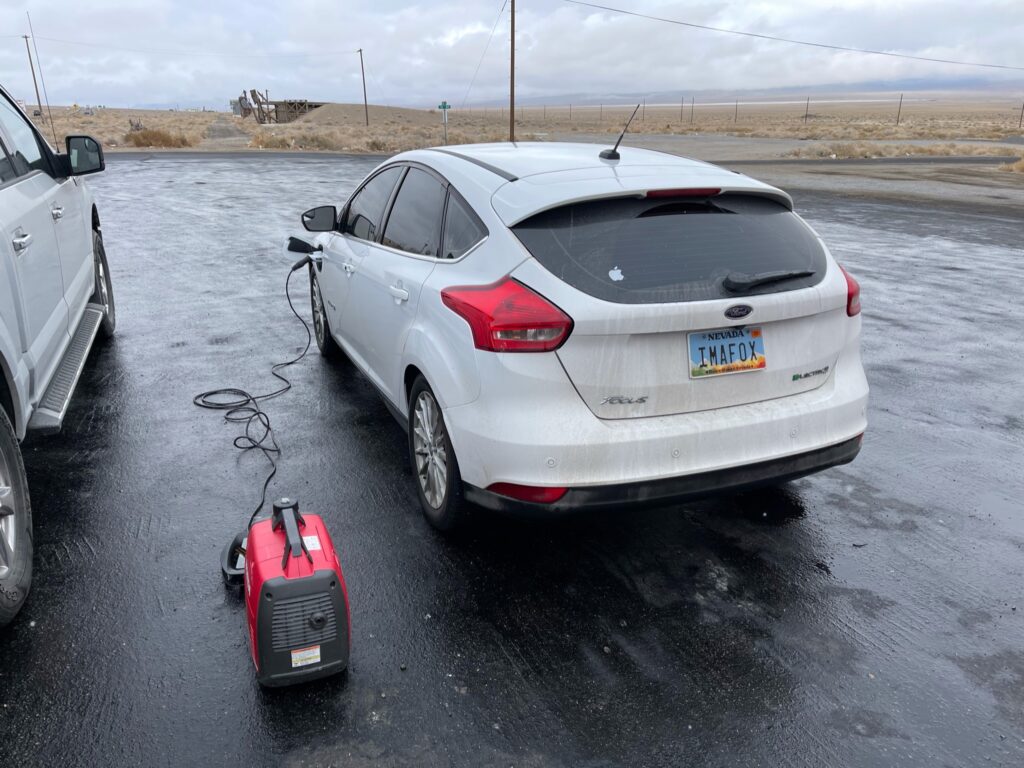
Generators.
Our portable Honda 2200i Generator running on low power mode provides enough juice to charge the car with an equivalent of 46 miles per gallon.
I only needed a few extra miles to make it to the next DCFC in Hawthorn, so we took lunch, caught up on social media, play games, and relaxed while our little car charged.
After a short time we were back on the road to Hawthrone.
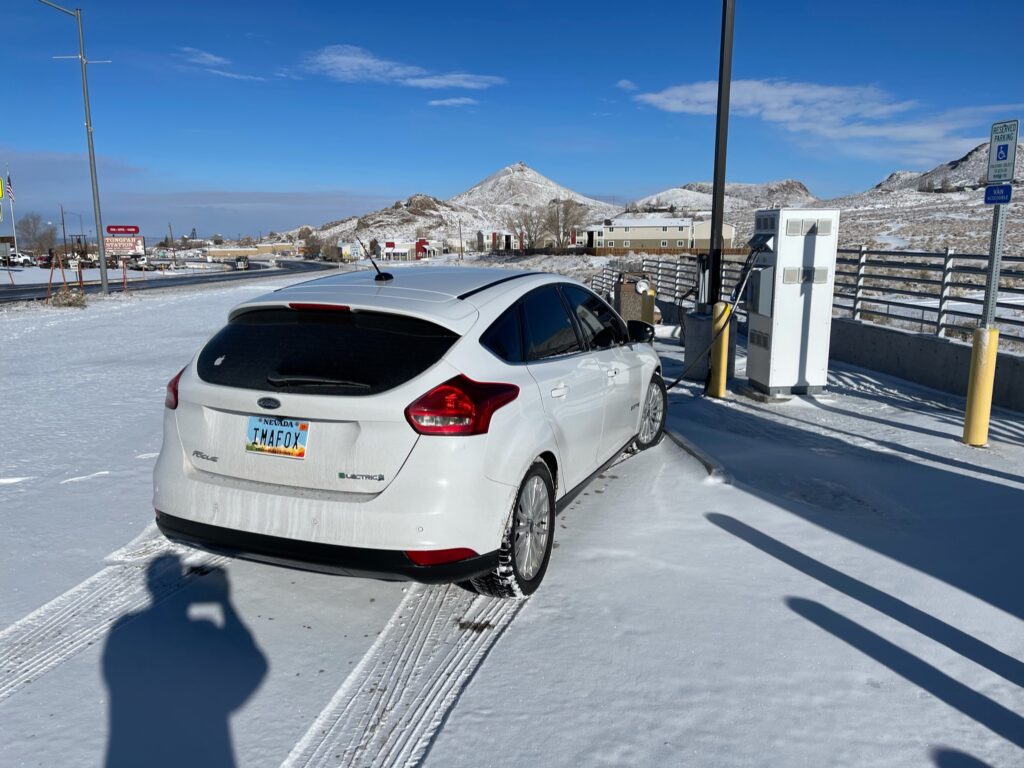
Sadly, the DCFC was in a handicap spot…I stayed with the car in case I had to move…
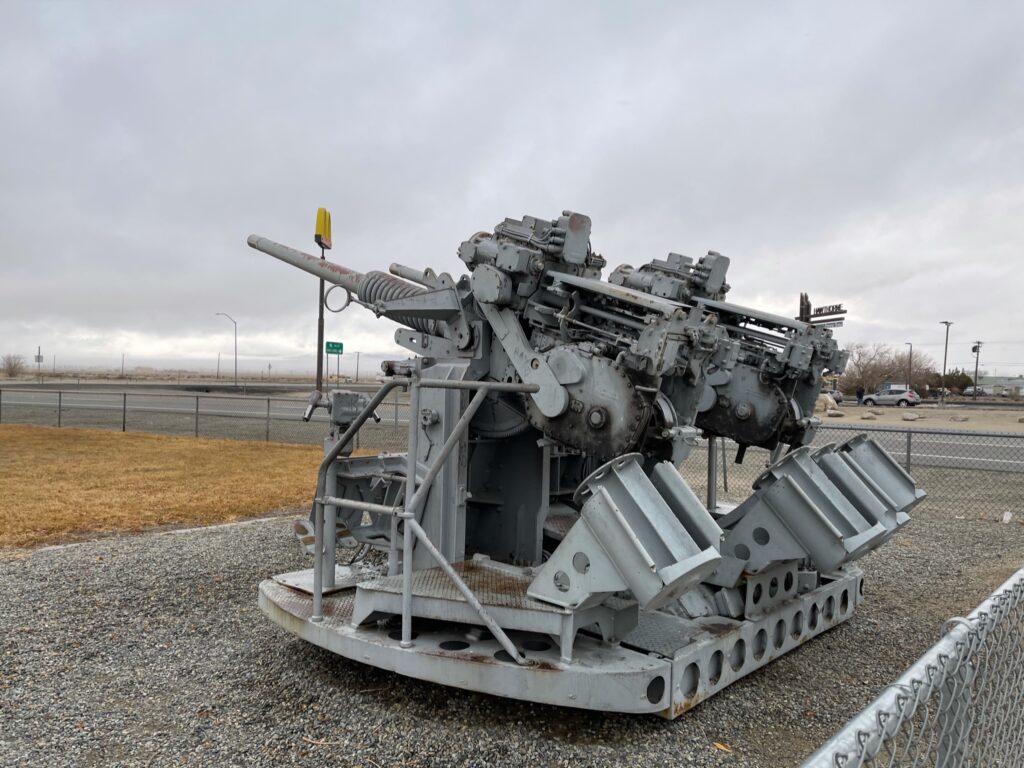
Hawthorn DCFC and Surrounding Area
While I was charging Sean went food shopping, then we continued up to Fox Peak, our next DCFC along the route.
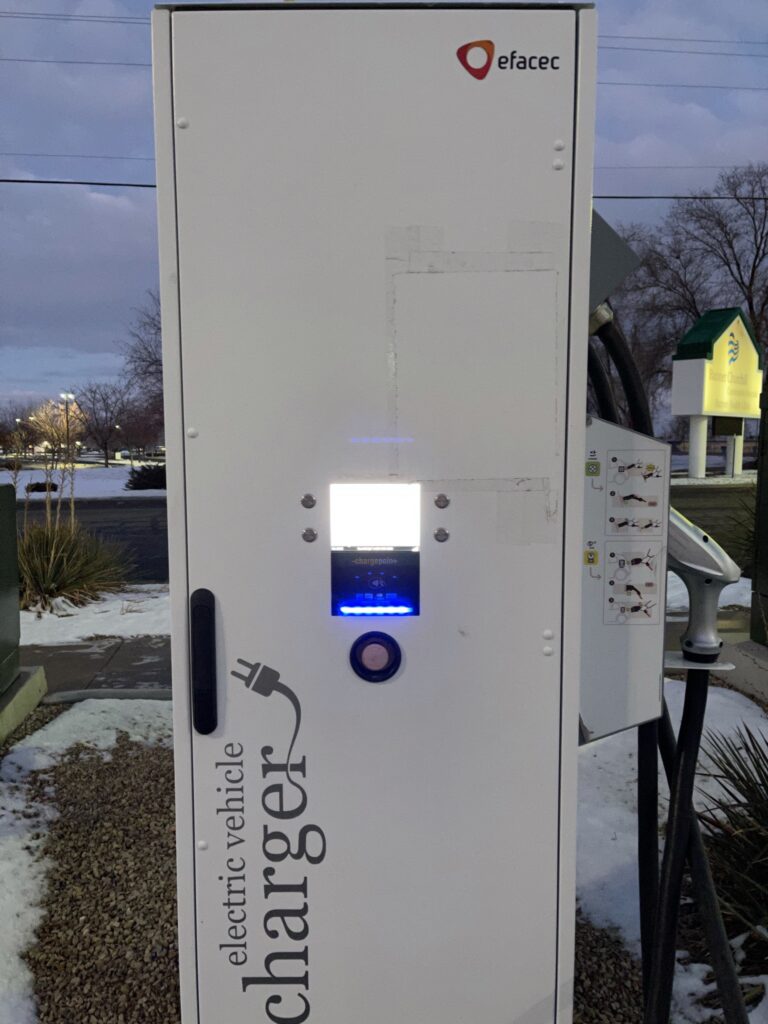
Just for shits and giggles Sean stopped the camper at Four Seasons Smoke Shop DCFC – another EV-Connect station. It too was down due to no network. Apparently Verizon was down in the area causing all the EV-Connect stations to not work.
Inoperable Stations at the Four Seasons Smoke Shop
While it would have been nice for these stations to be in working order, they aren’t critical to our journey as there was plenty of charge on the battery to make it to Fox Peak.
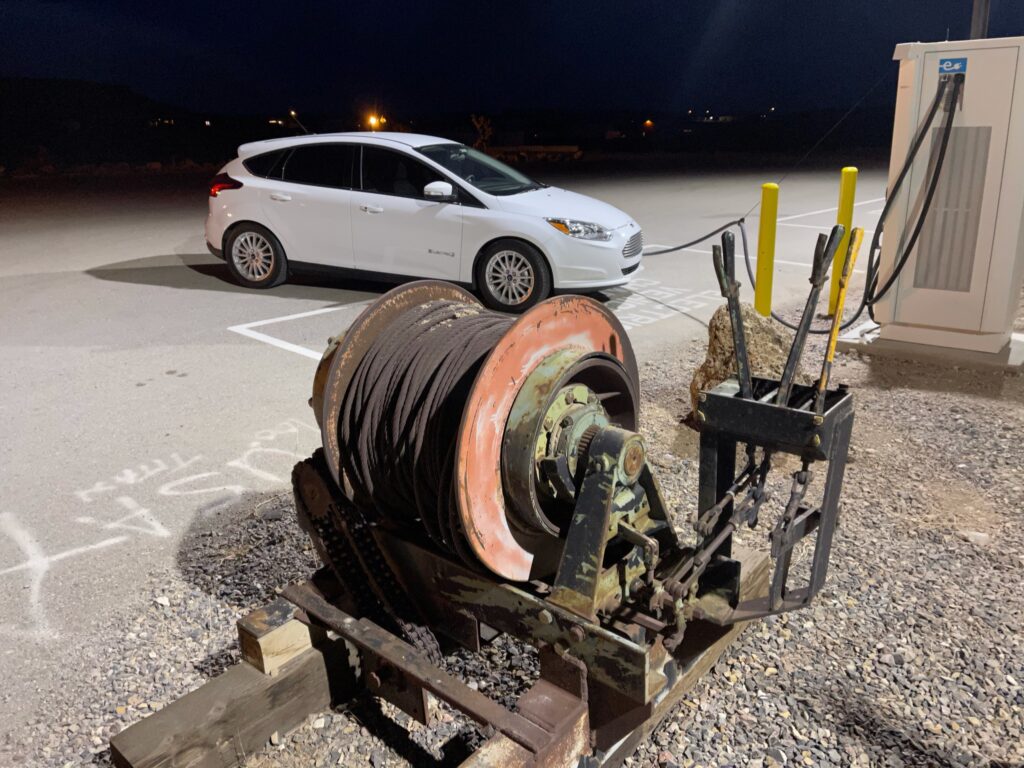
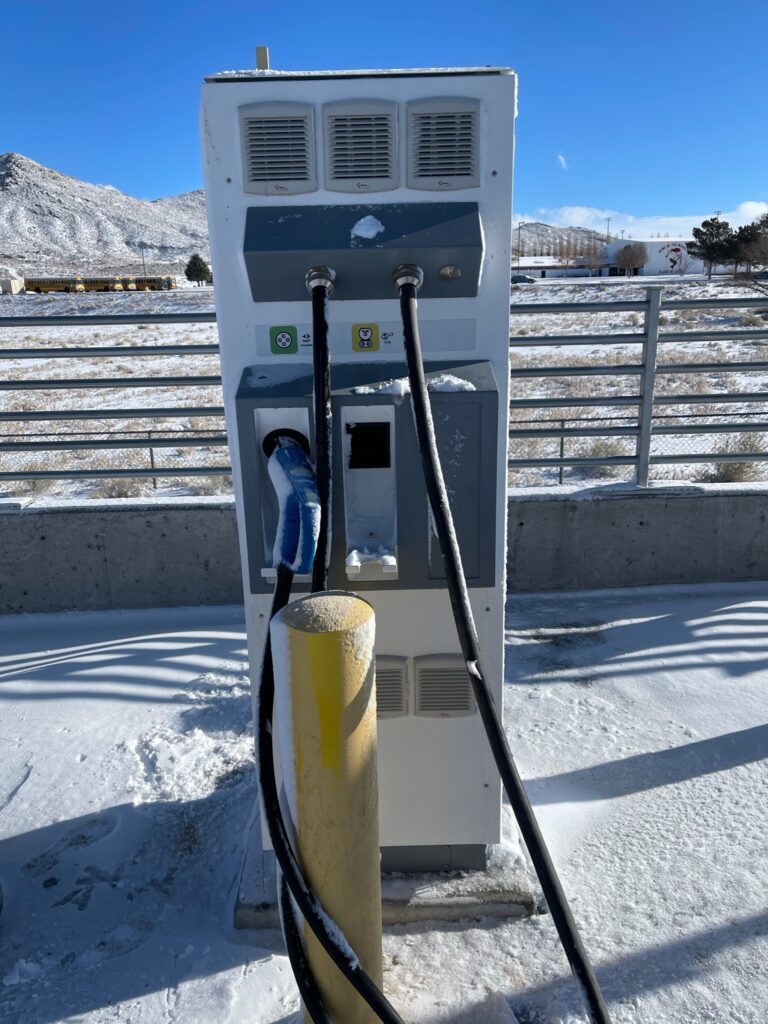
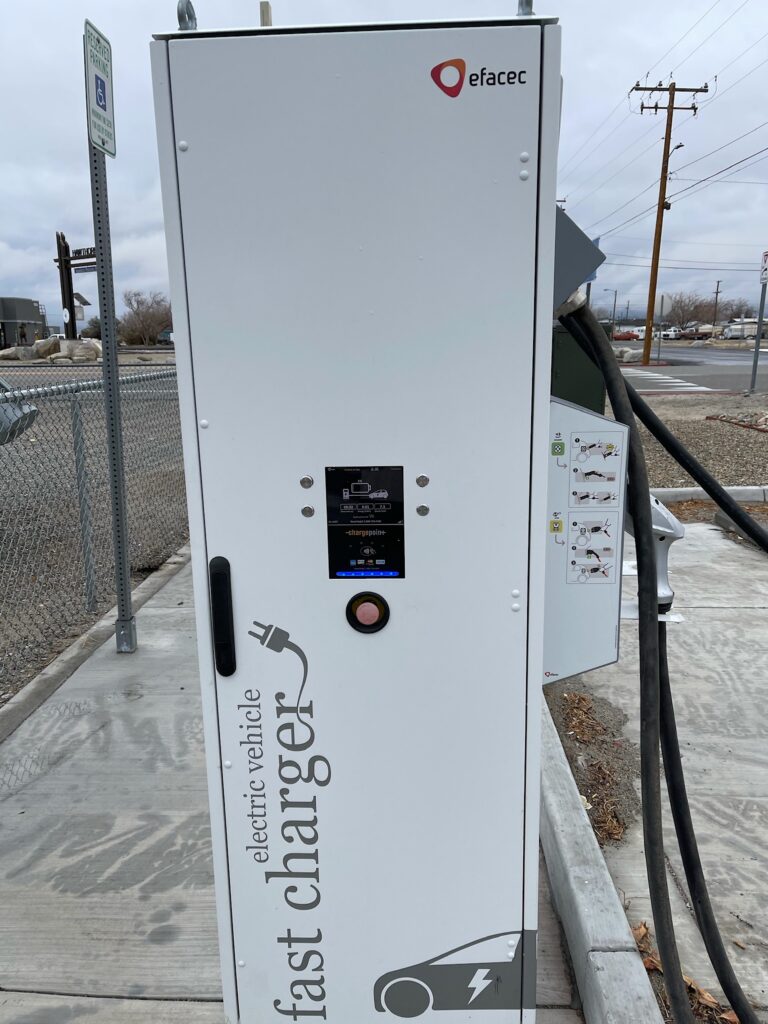
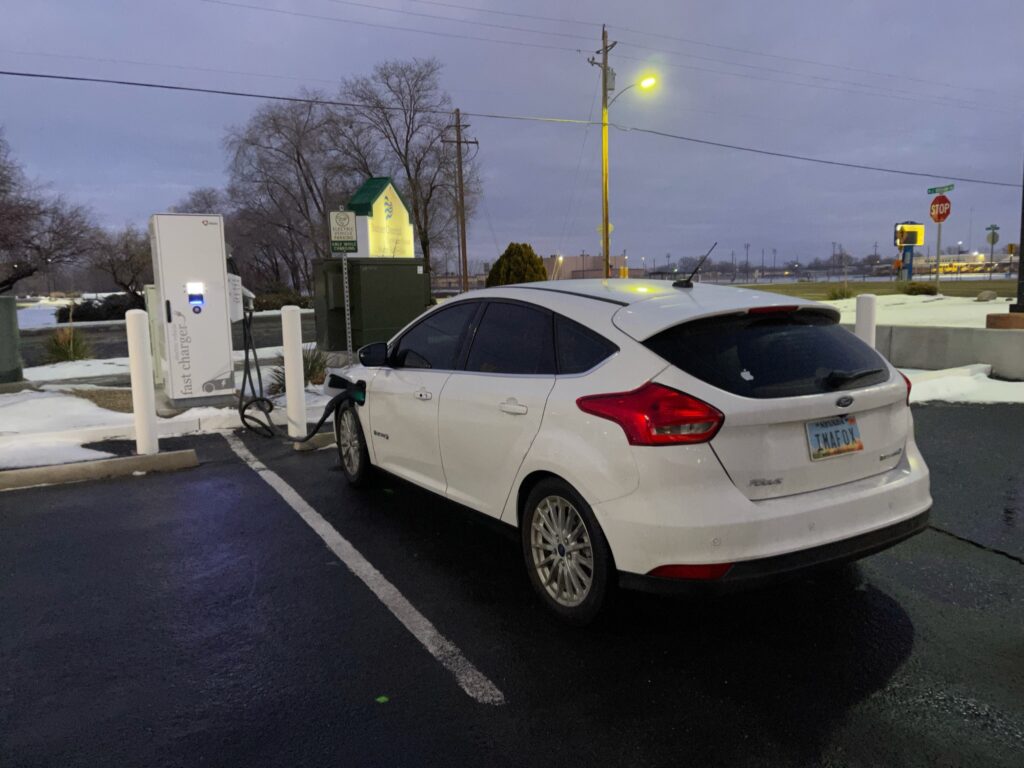
Fox Peak DCFC
After hooking up at Fox Peak, I joined Sean in the Airstream for dinner. By the time we were done with the dishes the Focus was ready for the next leg of the journey – Rye Patch Rest Area. There is no DCFC in Rye Patch, but that didn’t matter. We were only fifty miles from our destination. We overnighted at the truck stop, employing the generator while we slept to get the car ready for the final leg of the trip the next morning.
My view for the better part of three days…
We made it to Winnemucca early Sunday, plugged the Focus into the RV Park’s hook-ups and are done with the trip. We drive 520 miles and used 1.8 gallons of gasoline in the generator to make up for the inoperable DCFC in Lunning, Nevada.
Had that station been open, we would have arrived Saturday night.
Two years ago we made a trip to Sacramento, California in the very same Focus Electric with no issues as the charging infrastructure to the west was better at the time. Back then I wouldn’t have even entertained the idea of a cross Nevada road trip.
I do hope that more and more DCFC stations open across all the highways and byways in the land. But until then, there is always Plan B…